Reversible Coat

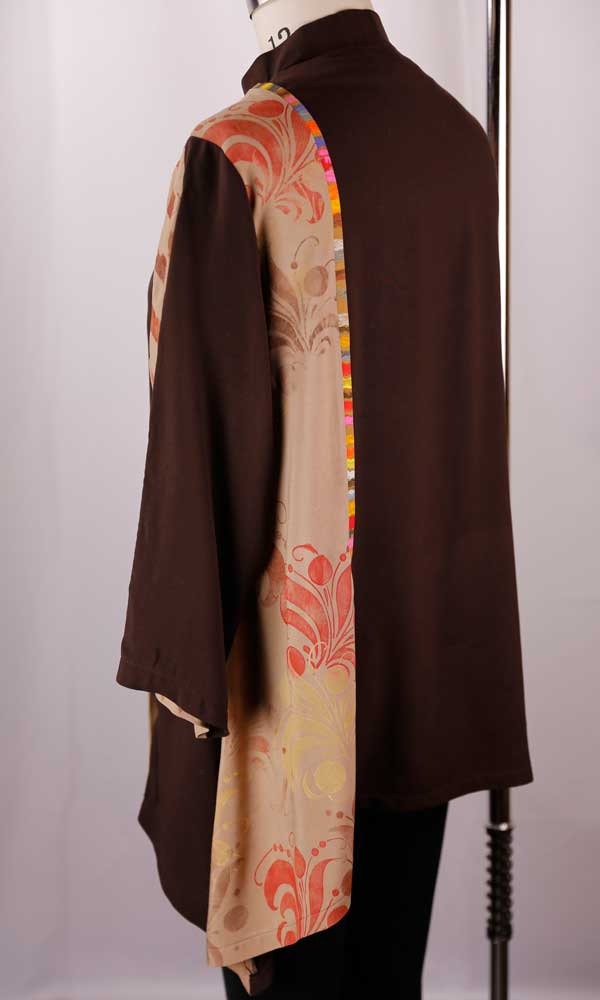
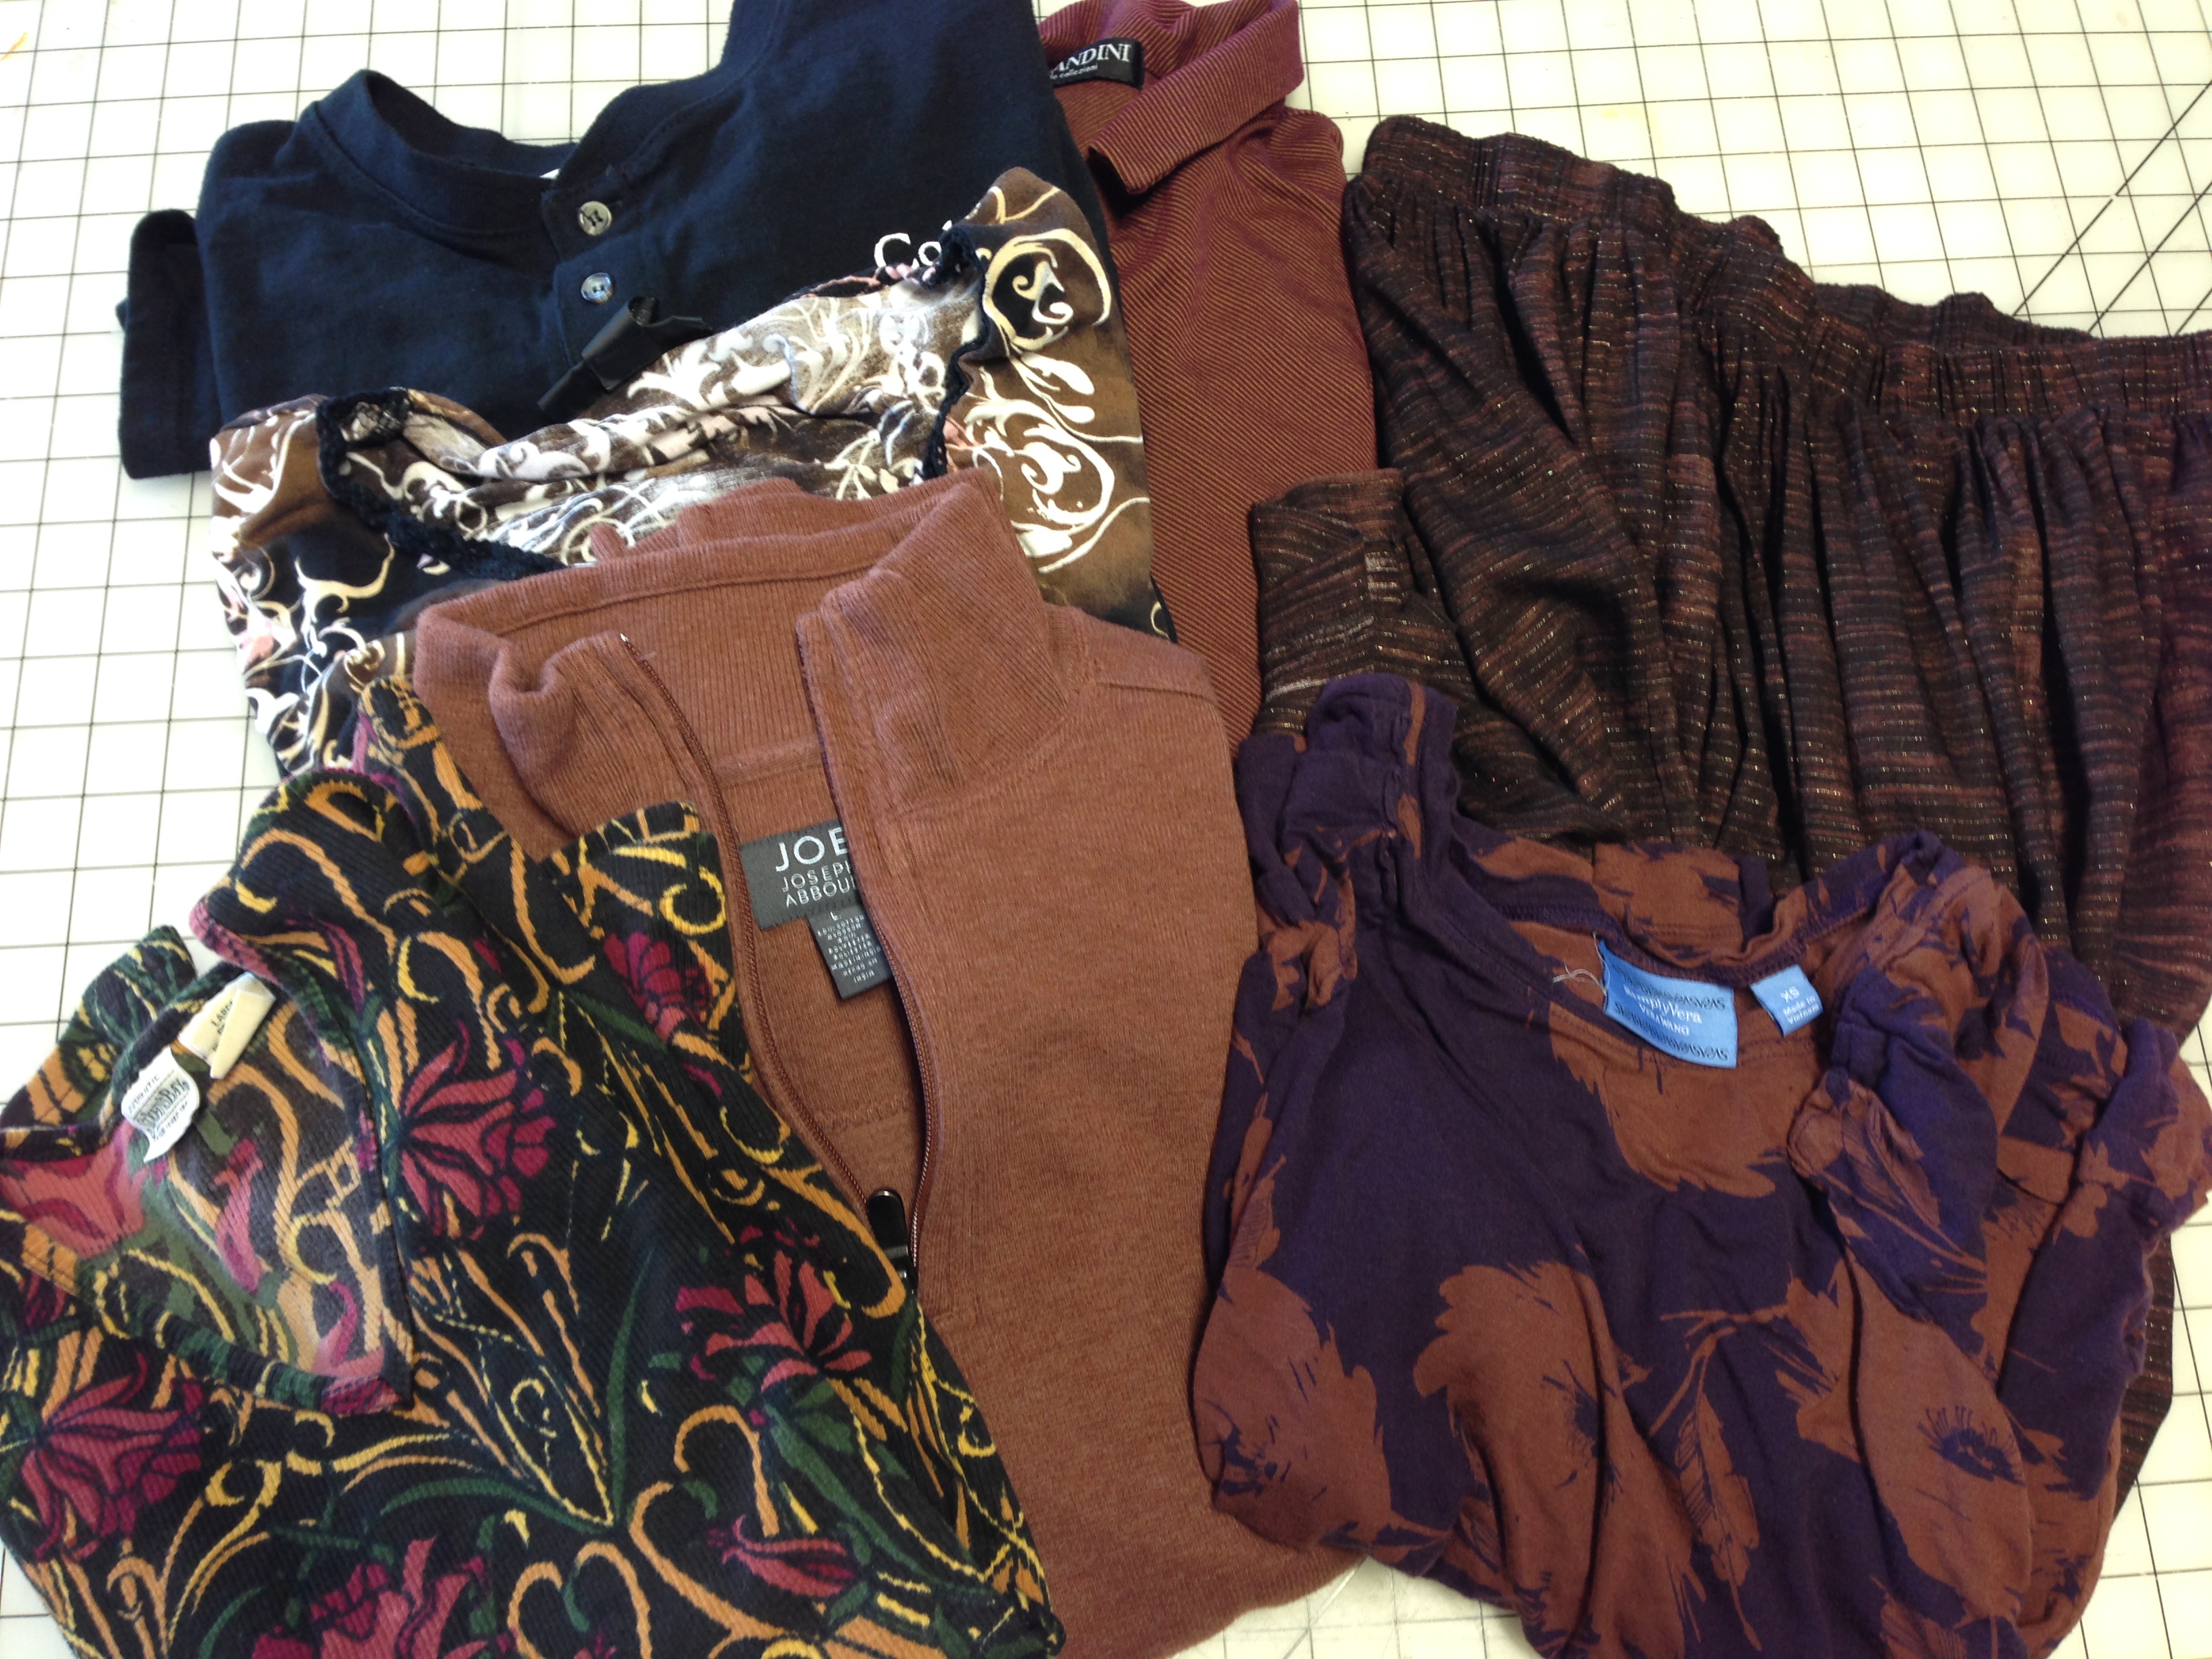
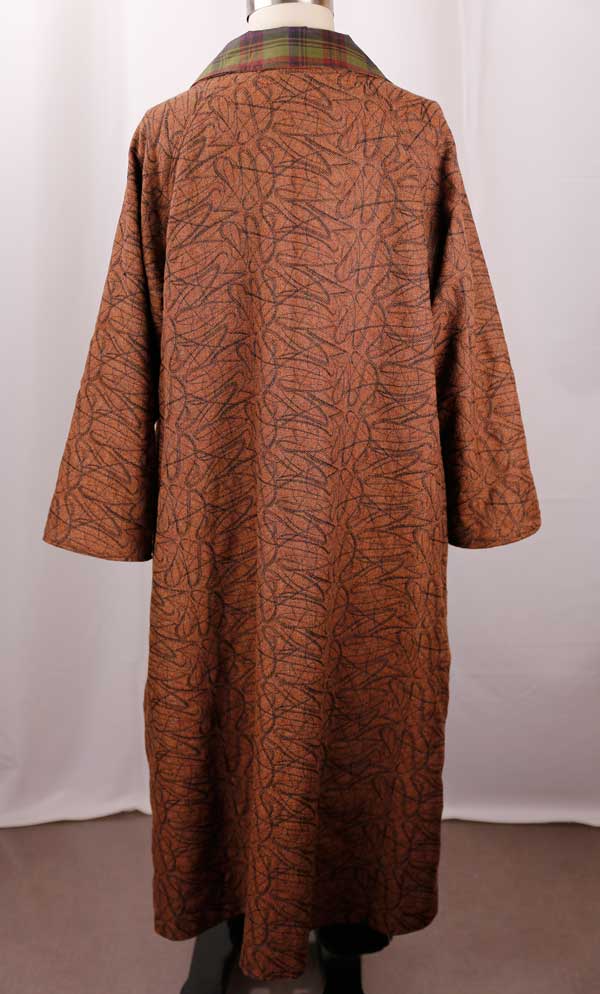
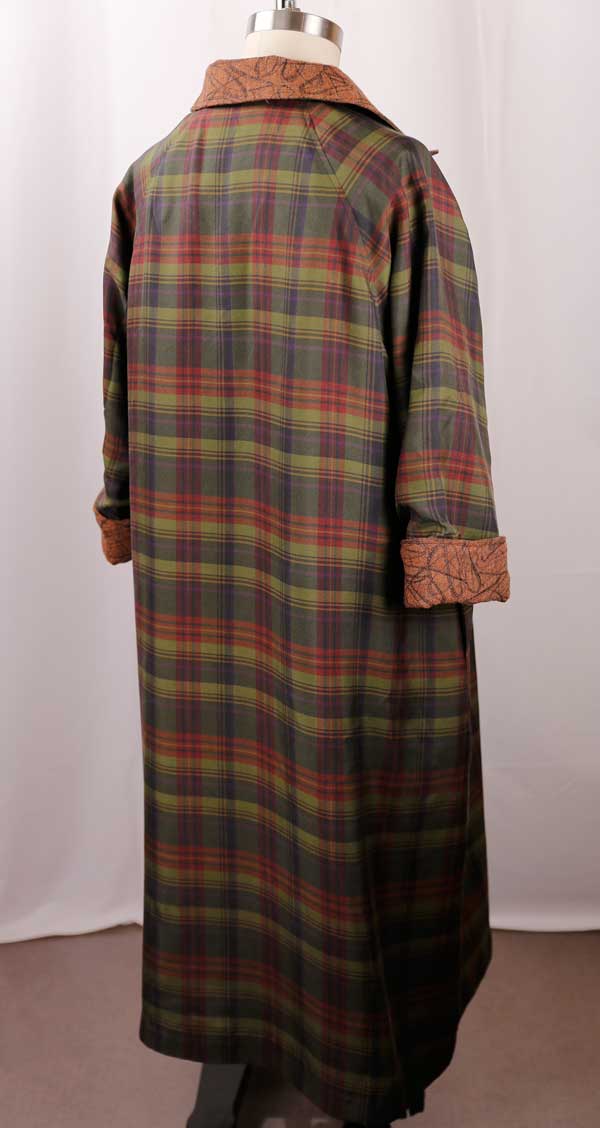
I’m finally done with my first, and maybe last reversible coat.  I say, “maybe last” since the first coat came out so well! If you remember my Unintentional Wardrobe post, I have two more fabrics that I originally intended for a travel coat. The fabrics for this version were in my stash and I decided to use them for a first draft. I love how easy-going this pattern is. The out-of-print  Butterick 6269 goes together well and produces a simple roomy coat that I will be able to use as a blanket on the plane, and can easily fit over other layers.

Reversible-Coat-One-2

I still have some work to do on the coat. First, the coat is still not waterproof except for the natural water resistance that wool provides. I just don’t love the crunchy or slippery feel of raincoat fabric. The plaid looks like a raincoat fabric, but is actually a silk twill. A spray waterproofer would work well in this instance since they don’t seem to change the hand of the fabric. Will I use the reverse side of the coat with the plaid out?  I think I would if the plaid side is water-resistant.

Reversible-Coat-One-4

Second, a hidden pocket for documents would be a nice addition for travel, so I might add one into the side seam. This is easy and will only take an hour or so to complete, therefore I think that it’s a must do.

Reversible-Coat-One-1

Third, I may hem the coat shorter. I love a long calf-length coat, but I’m worried about the weight while walking  around Rome and Paris. A knee-length coat would suffice, but I want to get a few more pieces of my travel wardrobe together before I decide on the exact proportion.

Reversible-Coat-One-3

I’ll let you know what changes I pursue over the next few months! Next week is a summer top!

Another Lynn Mizono Shirt!

It’s been a few weeks, but  I’m still sewing with little pieces of time here and there.  The blogging keeps me enthused to keep trying new things, and it’s such a fun way to communicate with other sewers!Mizono-Top-3-Front

I love these Lynn Mizono shirts and this is my third one! Vogue pattern 1274 is a fun pattern to work with, since there are so many ways to manipulate the pattern. Both main fabrics are inexpensive but soft and comfortable rayon solids. The tan was boring, boring, boring, so the stencils came out of the drawer to make two different patterns. The gelli-plate i used for printing was fun, but not necessary for these designs. However, try one if you haven’t because there are lots of inspiring ways to use the plates.Mizono-Top-3-side-2The back panel is split up to add a little detail, since I decided to cut off the wings. If you’ve made this pattern you will know about the wings! They are cool, but just not my style, I also make the sleeves straight instead of having more fabric at the cuff.

Mizono-Top-3-sideThe split sleeves were a mistake. which I refer to as a GDO (good design opportunity). Instead of getting all worked up about a mistake I just try to think of a cool way to use it to improve the design.  I cut them backwards, but liked the harlequin effect at the shoulder. I just decided to get out my harlequin stencil to match,. The two different prints sure fixed the boring beige!

Mizono-Top-3-DetailAbove is a photo of both sides of the strip button placket. My BSF helped me with the buttons. She has an incredible button stash. We could not find the right set of buttons so we decided using mixed colors would be the way to go. The look is especially nice with the stripe button placket I decided to insert.

Colorado is having a wet cool spring, so I’m still waiting to wear this….can’t wait!

2T Vest #1

I had to name this vest #1 since I love it so much I have already made a second one. I’ll photograph that one and put it on a later post. The idea started with a vest on Diane Ericson’s blog.  My BSF (Best Sewing Friend) Debra and I started with a trip to Goodwill. Goodwill HaulWe met there and spent a half hour picking out men’s and women’s knit tops that color coordinated. Her stash was black, grey and blue. Size doesn’t matter, in fact the larger the top the more fabric you get. I spent about $24 and will be able to make at least 3 tops from this pile.

The next day we met and started to chop and sew. This vest is made from the two tops from the lower right. 2T Vest #1We tried them on before sewing any side seams and made adjustments like darts if needed. The whole idea for this garment is to wear it over a turtleneck, so the fit is easy. The original collar is from the man’s shirt so you get a zippered neck without any effort! The black pockets and back detail consist of some black knit from my stash embellished with scraps from the women’s shirt. A little hand stitching and a sewn on “necklace” finished it off. Women’s clothes so rarely have usable pockets making this an awesome practical top for everyday wear.2T Vest #1 Details2T Vest Back Neck