Have Scissor will Travel

_O0A1074  2016-07-03-11.48.58-1

This project started with a fail by me. For my BSF’s birthday, I made a holder for sewing tools that hung around the neck. Luckily I put a few nice tools in it because the holder was useless! A few weeks later Debra suggested that we design aprons that would hold our tools, and that sounded like a great idea (and helped me save face).

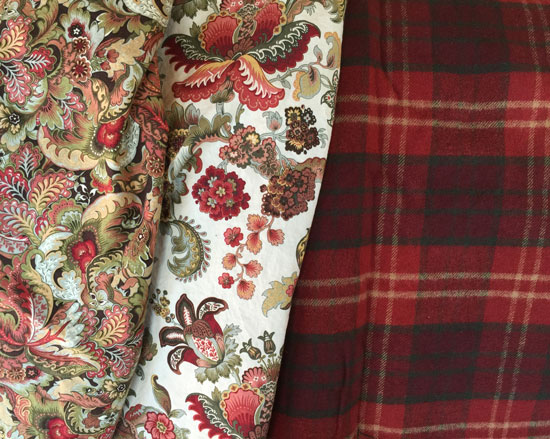
We got together with a pile of fabrics, some inspiration photos and started planning. She wanted one to tie, and I wanted one I could just slip on. We made some paper templates and were soon cutting into fabric. The good news is BSF-Debra actually came over with her finished apron so you get to see both!

This is her apron with the cool textured denim and accents of lime green including a fabulous piece of green leather. I used my machine to embroider her logo that her husband had designed for her.

_O0A1068 Debra-logo

_O0A1065

It functions the best of the two aprons, and if you decide to make one, follow her lead in putting the tools center front so the apron hangs evenly. The other advantage is room for two pockets for hands. She found the badge reel that we are both using to hold a pair of small scissors. The front pocket holds large scissors, marking pen and pencil, measurement gauge, and a seam ripper. She has also tied on a 36” tape. Needle and thread can be pinned on the flap at the top.  Honestly, what more do you need?

2016-07-03 11.44.37 copy  2016-07-03 11.44.53

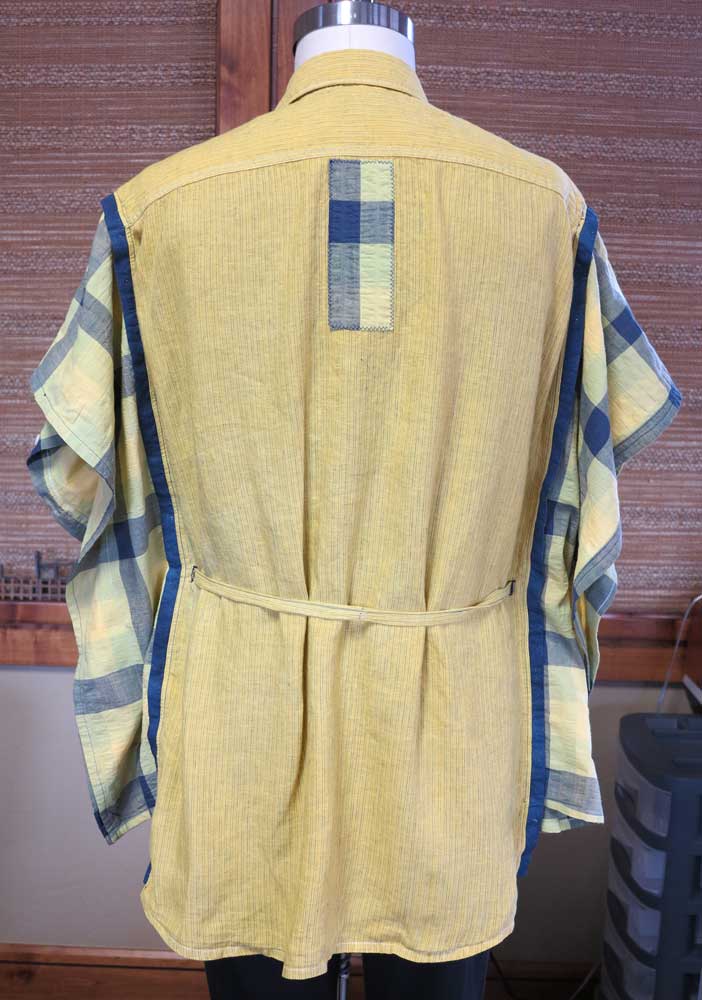
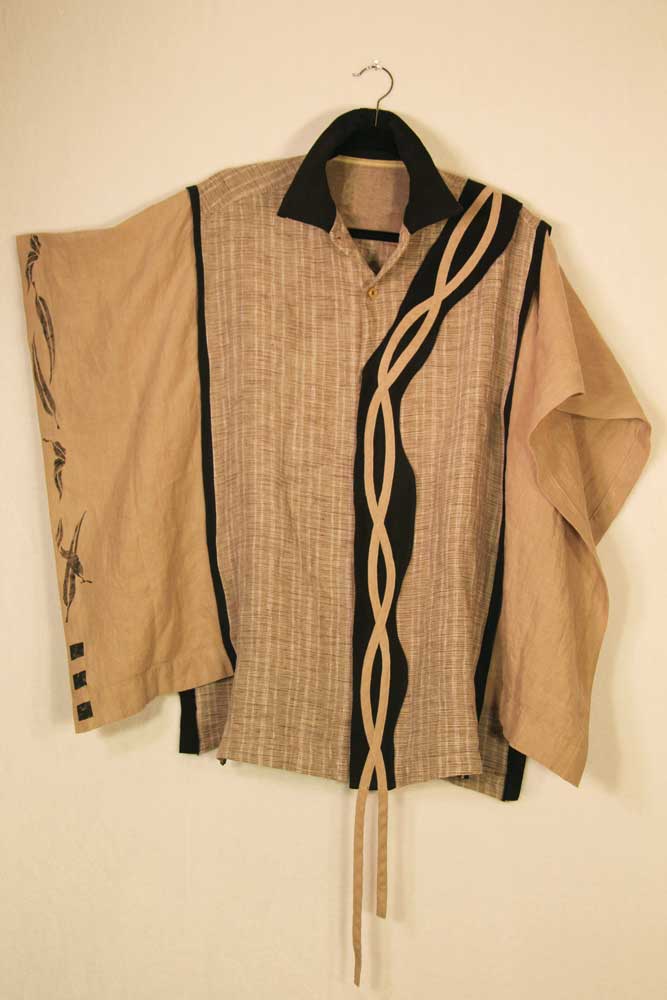
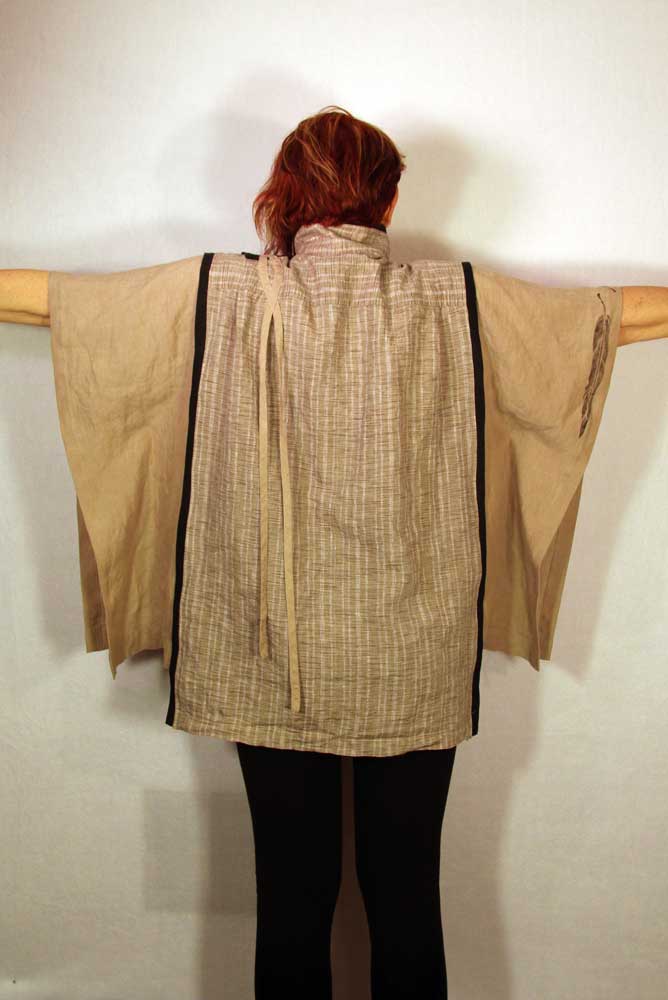
We are both constantly amazed that we can start out with the same idea and end up with completely different looks. I wanted to have some asymmetry to mine, but unfortunately at a slight loss of function. However, other than leaving my large scissor out of the pocket most of the time, mine is a pleasure to wear.

2016-07-03 11.47.06Since I like to embroider with my machine, I digitized a drawing of my tomato pincushion and placed the embroidery on my shoulder to hold pins. The dot fabric has some free-motion embroidery and I added some color to the black fabric with the help of some Diane Ericson stencils. The linen cat fabric came from Elfriede’s Fabrics and the crow is also from a Diane Ericson stencil.2016-07-03 11.44.37

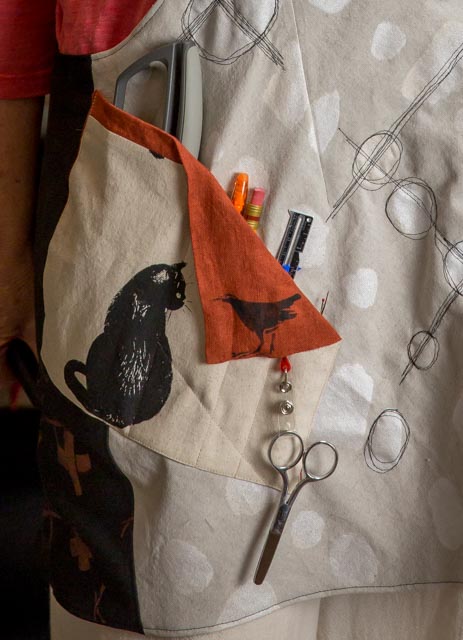
Both of us love our aprons and it’s such a relief to not be constantly hunting for tools! Happy sewing!

Plaid Shirt…coming soon!

So much to share and so little time! As promised months ago I plan on sewing slower in 2016 and showing you more process, including how I come up with my ideas. This may be my last blog of 2015, but I plan on starting in January with lots of new projects.

The big news: I bought a new sewing/embroidery machine! It’s a Husqvarna Viking Epic, and this baby is huge! The embroidery hoops are as large as 360 x 360 mm (14” x 14”). The Epic has all kinds of new features that I will be exploring in 2016. What sold me on this machine over other brands? Well for one thing, There’s great dealership close by called The Sewing Circle. But best of all, the machine is spectacular. It has a large (iPad size) touch screen. Then there are tons of beautiful stitches including appliqué, sequin and very large decorative stitches, not to mention the embroidery function. The instructions are on the machine screen, so I stitched an embroidery pattern right out of the box! The machine has Wi-Fi capability so it can be upgraded, and stitches can be uploaded without dealing with a usb stick. Usb will disappear sooner than later. Wi-Fi is the way of the future, so this was important to me. I’m already planning projects to use the new features.

That leads me to my next project. This time, instead of showing you the finished project, I’m going to try and explain my thought process before I even start sewing. My BSF and I spotted some wonderful thick flannel plaid at Jo Ann’s Fabric (of all places!). We both thought of a warm winter shirt to wear on casual days.

Well I don’t want to make just a shirt. That’s fine, but what else can we do to take this to the next level of design? First it’s off to Pinterest to get some ideas flowing. What struck me was how many times I had pinned plaid (or tweed) with floral appliqué or embroidery. I have started a new board named Project Ideas where I can pin inspirational photos for upcoming projects. The board currently includes this shirt plus some ideas for the silk velvet purchased in Paris. You are welcome to follow me on Pinterest!jacobean-plaid

Second, BSF and I decide it’s time for further inspiration by purchasing an accent fabric. I found these two florals and bought 2/3 of a yard each. 1 yard was too much and a ½ yard seemed too little! At this point, I was thinking the darker, smaller print for facings and the larger print for an appliqué or two.

But wait! I decide to buy this new sewing machine that embroiders. Of course I go online to see what is out there in the world of pre-designed embroidery patterns and find a set of Jacobean florals that almost match my fabric!Jacobean-Fabric-and-Embroidery

One of the great things about searching the Internet is I didn’t know I was working with a Jacobean style floral. Isn’t it fun to learn something new? The threads of this embroidery can be changed to match the cotton floral fabric. Now the design process is getting exciting!

Third, the pattern needs to be picked and/or altered Here is a mood board of my favorites from the Pinterest file. mood-board
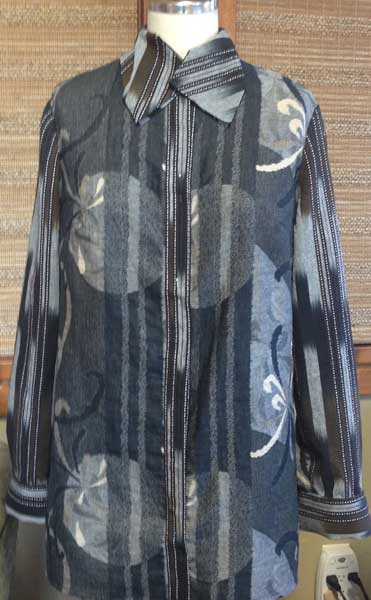
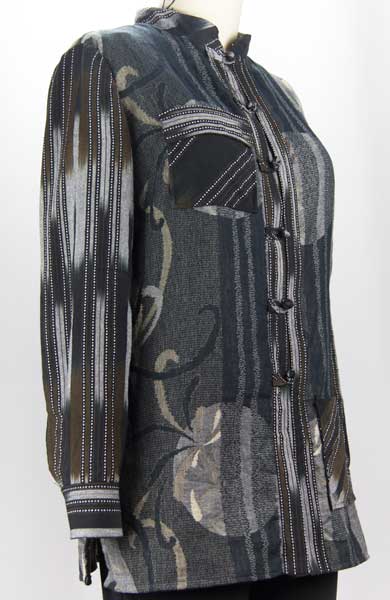
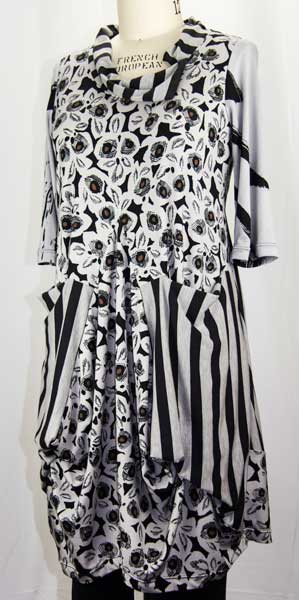
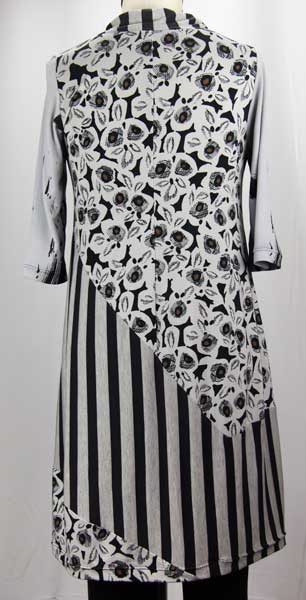
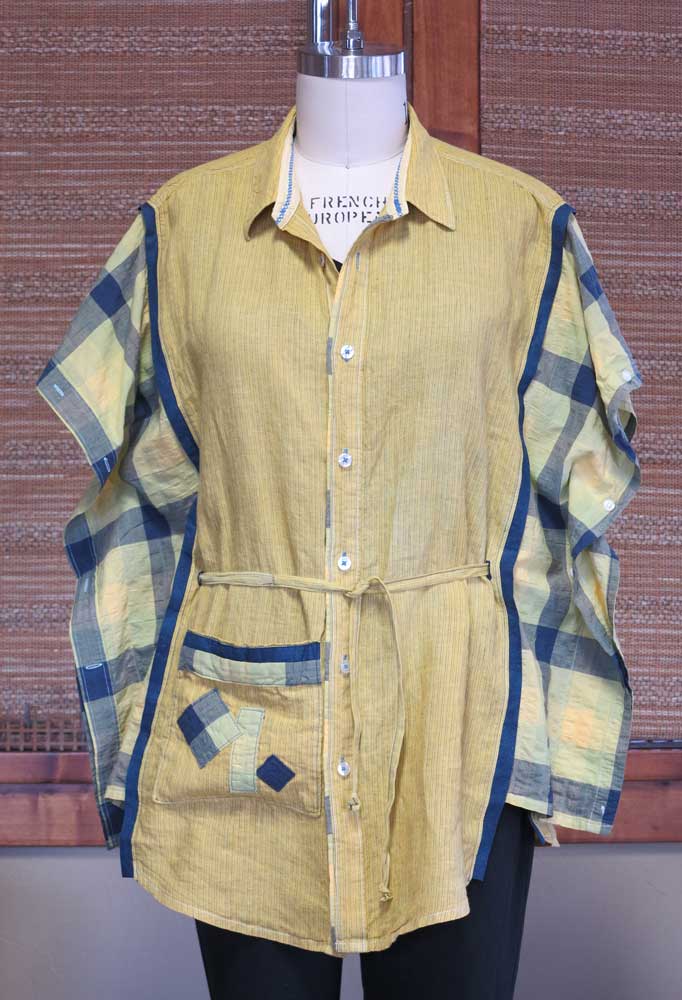
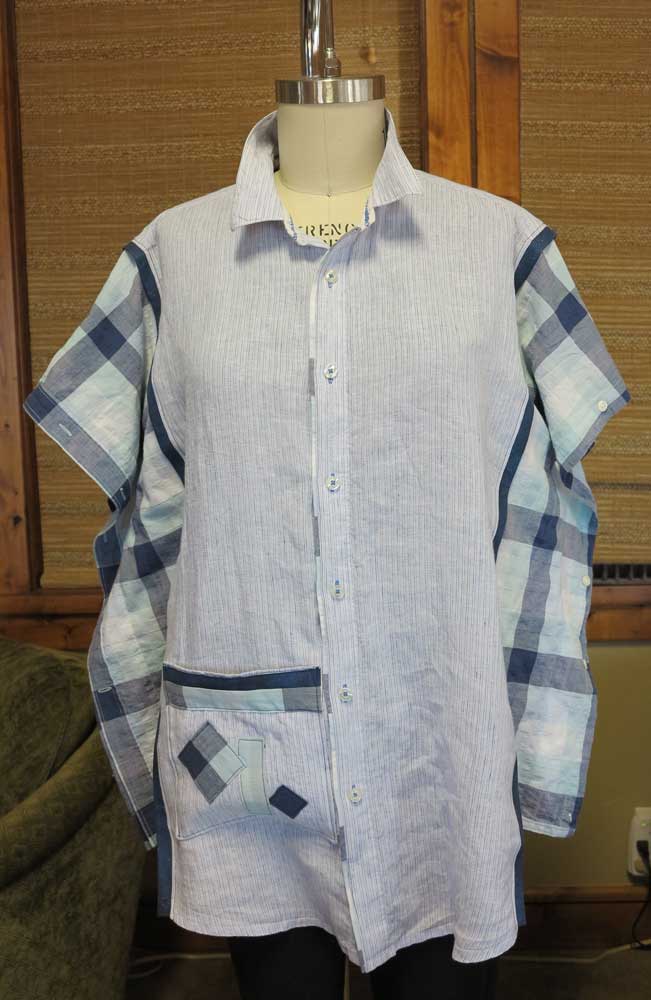
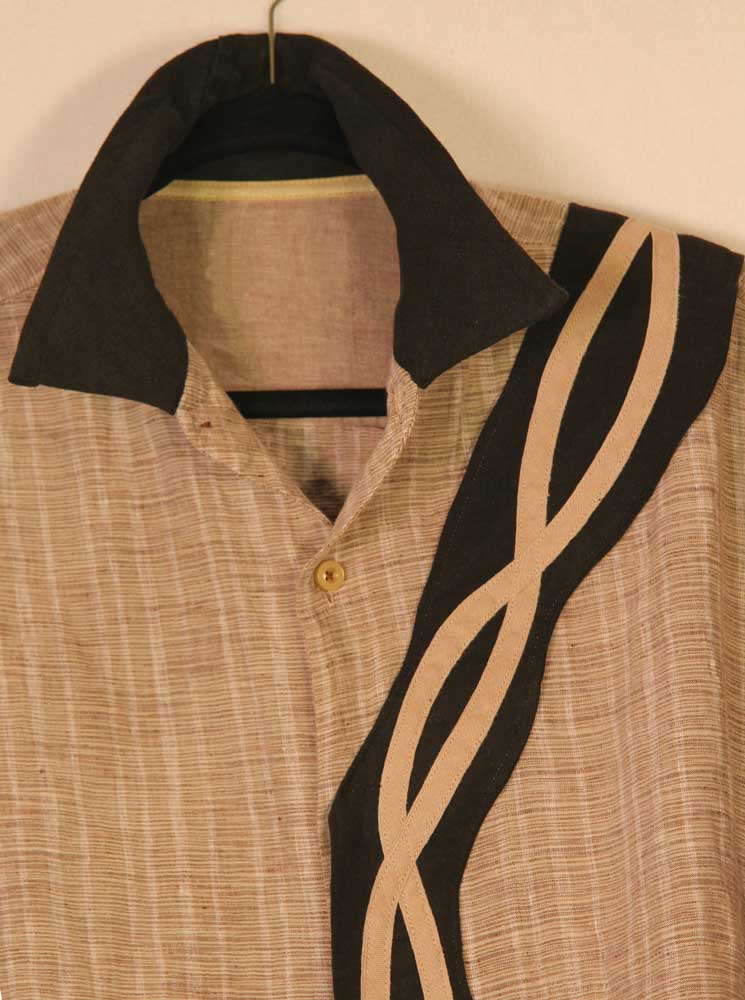
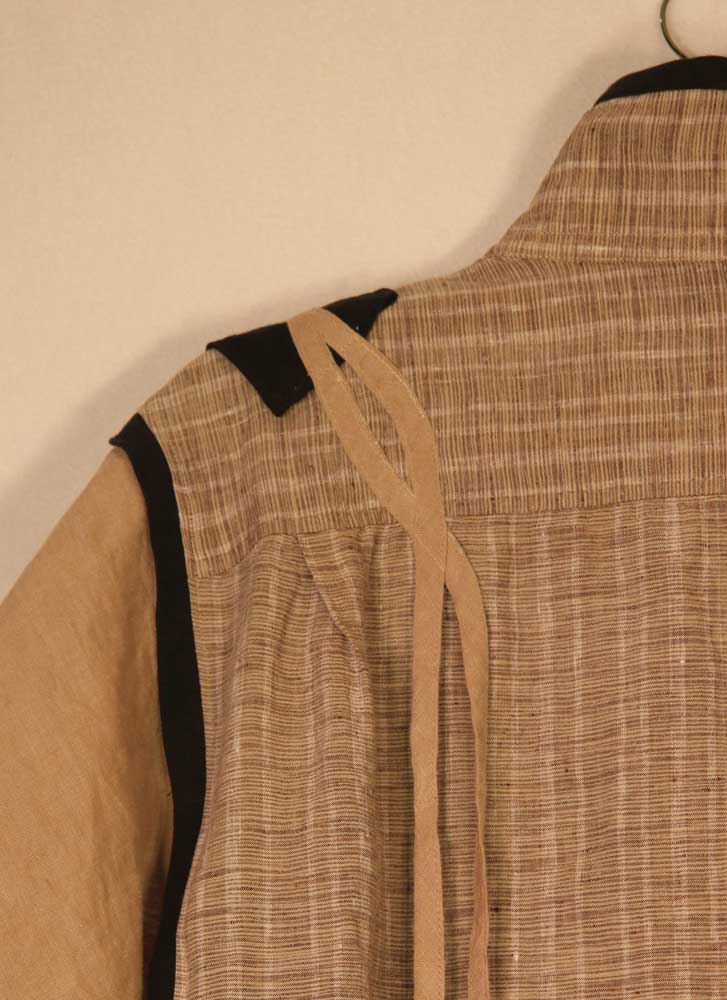
The grey and black tunic from Soft Surroundings (bottom right) is the closest to the shape I want, but I love the bias pleats of the Alexander McQueen shirt (top right). The shapes of these two shirts aren’t completely compatible since the McQueen shirt would be boxy in shape.

Black-muslin_Backdischarge-silk-shirt_2

I made the shirt on the left last January with pleats in the back, but I can stitch the pleats together at the waist similar to the shirt to the right.

Now it’s time to start cutting, sewing and embroidering, so this is where I will leave everyone hanging  (hopefully) in anticipation! I still need to decide where to place the accent fabrics and embroideries, but I think I will decide as I cut out the pattern. Some things need to be spontaneous. You will all have to let me know if the final shirt looks like you imagined from this post.

Painted Shoes

Painted-Shoes_2I have been working on multiple projects this week, including these painted shoes. My BSF and another friend, artist Karen Ramsey, came over to my studio to paint fabric, aprons, and shoes. We had a fantastic time with lots of creative energy! The fabric is still a work in progress, but Karen is a wonderful artist and sketched with paint on an apron for me and a piece of fabric for Debra. I also have a piece of fabric in progress, that will show up at a later date.

Last fall I bought a pair of these relatively inexpensive Aerosoles from DSW. They were so comfortable, especially for a shoe with a bit of a wedge heel that I ordered two more pair to paint. That was at least 3 months ago, but with two friends to encourage me, I finally tackled the project.

We pulled out all I have of Jacquard Neopaque and Lumiere and started painting. I’m proud to say we were fearless! Painted-Shoes_4I wanted one pair to work with my favorite browns and oranges without completely eliminating the black (since I often wear black pants). Painted-Shoes_6The other pair I plan to wear with jeans and maybe a red sweater. I often buy red shoes, but they are usually with black without the denim blue accents. I think I will wear the earth tones constantly especially in March when we get to the transitional weather.

Ichi-on-PonchoNext week I’ll show you my $1300 Poncho (of course I didn’t spend that!) as soon as I can get my cat off of it.

Ventana Vest by Diane Ericson

Diane-Ericson-Vest_2I promise this will be my last vest for at least the month of November, because you never know when the vest urge will hit!

This is an exciting vest that I have been waiting to blog about. When I went to the Design Outside the Lines retreat in September, Diane Ericson let us all test her upcoming Ventana Vest. It’s now out and available for purchase so I can show you both of our examples!

My BSF and I started right in cutting and sewing. This vest is very clever. The tucks give it shape and there is a clever folded in pocket. Typical of Diane’s patterns you can follow it exactly or make changes to make it your own. This is a photo of the vest made by my BSF Debra.

Ventana-Vest-Debra

I left mine all funky and floppy. To add a little splash of color and pattern, I appliquéd a cotton woven with a stencil by Miles Frode combined with one of my own stencils.

Diane-Ericson-Vest_4Debra tailored her vest by closing the seam next to the pocket and taking in the sides. She also played around with the tucks in the back by elongating some of them. Ventana-Vest-Debra_1Her mother bought a new scarf that matches perfectly. I think Debra talked Honey into giving the scarf to her.

Ventana-Vest-Debra_3

Here is photo of my back. You’ll notice that Debra also cut her collar a bit shorter to stand up at the neck. I love her changes and will incorporate some of then to my next version. You can see why I can’t promise no more vests!

Diane-Ericson-Vest_1

Vest Refashion and my BSF

Ever buy something that doesn’t fit, but you keep it anyway? Well that is this vest. I like that it was long, but it’s too long. I love the belted waist, but it unfortunately doesn’t fit my waist! The neck is so small that it doesn’t comfortably fit anyone. At least I liked the fabric and the pockets. So there it hung, alone in my closet, waiting for some 6 foot tall, thin woman with an impossibly skinny neck.Black-Vest-Before

This is what I did:

First I cut off about 10” of length. Then I ripped out the side seams and finished them leaving an open seam under the arm. Shaping the neck into a V solved the neck fitting problem. Then I took the extra hem fabric and made a side panel to highlight the waistband that buckles in the front. At that point it looked pretty good, but I decided that the completely open side made it difficult to find something to wear underneath. My BSF Debra agreed with me.Black-Vest-refashion_3

Time to go shopping in my stash store! Debra and I found this cool laser cut neoprene fabric and that solved the side panel issue and provided a nice contemporary lace edge for the neck. It’s so nice to have a second sewing friend to bounce ideas around. Thanks Debra.

Black-Vest-refashion_1

Black-Vest-refashion_4

Speaking of my BSF, here she is finally appearing on my blog! Debra is modeling her fabulous hand painted shirt. It’s the Lynn Mizono Vogue pattern 1274 that we started together on one of our sewing days. Don’t you love the hand painted black trim? Snap tape hidden under the decorated edge secures the top. Those shoes, copper bracelet and cool glasses…you got it going on girl!Debra-Lynn-Mizono-shirt-web

Darts and Dots

Black-Grey-Shirt_4I bought so much cool fabric in Ashland last spring while attending Diane Ericson’s DOL. These two have been calling to me to make a tunic length shirt. I planned to make a shirt even before Ashland, but just couldn’t find the right pattern. I finally settled on McCall’s 6436 since it has the darts my shape needs. This fits fairly well now, but I will make just a few modifications next time to give a little more ease at the bust. With this shirt I ended up not overlapping the placket, but adding a back placket piece so I could use Chinese knot buttons. They are a lots work, but I do like the look.Black-Grey-Shirt_3

Speaking of the bust area, below is a progress shot of the shirt before I added the final details.

Black-Grey-Shirt-no-pocket I hadn’t planned on adding pockets until I saw the two big dots right where I don’t need two big dots. Even worse was one big dot and one wonky dot…I didn’t even realize the fabric had dots! Pockets to the rescue. I will never use the breast pocket, but it sure solved the problem.Black-Grey-Shirt_2

No inappropriate dots on the back…

Black-Grey-Shirt_1As this entry is sending, I’m on my way to another DOL! I know, I know…I’m a little obsessed, but I’m blaming this one on my BSF who wanted to go to Taos again. Who was I to say no? Taos last year was the event that got me so excited about creating, that I started this blog. My one year blogger anniversary is coming up!


Debra and Marcy I Apologize…

Black-Grey-Marcy-Dress My BSF made this dress by Marcy Tilton (Vogue 8975) and tried to convince me to sew one with her. “It will look like a big gunny sack on me” I scoffed. Well I tried on Debra’s dress when she finished and loved it! It’s comfy, clever, perfect for the change of seasons, and no, it does not look like a gunny sack. I should have modeled it, since it actually looks better on me than on Roxy.Black-Grey-Marcy-Dress_3

One does need to read the directions for this dress. The garment goes together fairly quickly despite many pieces and a few odd instructions, for example attaching a point on the hem to the bottom of the pocket.

Black-Grey-Marcy-Dress_2 I made three minor modifications to the pattern. The collar is my invention and I am very happy with it. You may see it again in the very near future. I used three fabrics instead of two, and I shortened the dress two inches so it doesn’t overwhelm me. There’s a lot of fabric in this dress, but it is light and soft so it all works. The back is pretty jazzy too!Black-Grey-Marcy-Dress_1

Can I Still Wear Linen after Labor Day?

Fall-Linen_4  I just finished this linen shirt this past weekend. Obviously, I don’t care about the rules of textile seasons, because I plan on wearing this shirt as a transitional weight until the cold sets in. It’s 85 degrees out today so I think linen will feel great. The Lynn Mizono shirt (vogue1274) is such a fabulous place to start. It’s funny how you start to make a pattern exactly as is, but if you just take a critical look at each stage things begin to change. “I don’t like the way this looks” can turn into “what a cool detail”.

The spotted linen on the left was a little too heavy for the wings that this pattern is known for. I could have pulled them to the back like the pattern suggests, but I had already decided to add a detail on the back that would be covered up. So I lightened the front by the asymmetrical hem at the placket. Then I added a tab on the back to hold just one wing. The tab detail gave the back an asymmetrical hem to balance the front. Fall-Linen_2

Just cut off the extra wing? No way, I turned it into a pocket. I love pockets!

Fall-Linen

Shirt Refashion #2

I mentioned on my first men’s shirt refashion that it came out a bit more formal than I had intended. While I loved the result I really wanted an everyday shirt for spring. This shirt is going in the right direction.Yellow-Shirt-FS

My BSF Debra and I got together to each make another refashioned shirt. She is still promising photos of her pieces, and as usual our two projects look nothing alike!

I started with two of my husband’s shirts that are too large for him. I liked the fabrics, but was hesitant about the color. Shirt-Refashion-2-FSI have red hair and brown eyes unlike most redheads with blue or green eyes. Fall colors look best on me. The light blues, while pretty just looked like an anomaly in my closet. In the end I put the shirt in a marigold dye bath and the result works better for me.

 These shirts are so much fun to make. All the hard parts like the collar and plackets are already finished. The final shirt just needs the panels added to the sides and some details to add some interest.

Yellow-Shirt-Button-Sleeve-D

Yellow-Shirt-Sleeve-Buttonholes-DNotice that the side panels still have the buttons and buttonholes! My BSF gave me that idea from her first shirt.

This shirt looked baggy around my waist, so I added a fabric tie belt. Yellow-Shirt-BSThe pocket is a nice addition for everyday wear. I try to add pockets whenever possible.Yellow-Shirt-Pocket-D

First Shirt of Summer – Men’s Shirt Refashion #1

I am so pleased with this project I can hardly believe it!Shirt-Refashion-1-FHMy BSF Debra and I got together to refashion some men’s shirts. She is going on some warm vacations so needs some new spring clothes now while it is still cold. After looking through our stash of used men’s shirts, I chose a linen shirt. In addition I added a frayed pair of black linen pants and a pair of linen overalls that had never worked for me. While not an absolute necessity, both Debra and I like to include a touch of black in our projects whenever possible to go with our favorite black jeans or leggings. Including your favorite neutral makes wardrobe management so much easier.

Shirt-Refashion-1-FM

I owned a white shirt that had a square poncho shape instead of sleeves. We both used it to get our basic idea for the refashion.Shirt-Refashion-1-BM I promise Debra is going to get me pictures of her projects soon. No one will believe how different our two projects ended up this day!

The men’s shirt is in the center with trim from my black pants and sleeve panels made from the legs of the overalls. Shirt-Refashion-1-FD2The bias tape decoration is made from the overall straps that I just left hanging instead of cutting. Shirt-Refashion-1-BDStill not done, I added some Diane Ericson stencils to one sleeve for balance.Shirt-Refashion-1-FD

While it ended up dressier than I had ever imagined, I am very happy with the end result. So much so that I have already made a second version that is not photographed yet. I usually hate summer clothes, but have high expectations for my warm weather wardrobe.