Joan’s Easter Purse

Easter Purse_2My husband and I planned on visiting his mom Joan last week. Unfortunately, I ended up sick and had to postpone the trip. Joan, this is in the mail for you, so the post will be a surprise before the present!

I’m at my BSF’s house complaining that I just can’t find the perfect spring fabric for this purse. I turn around in her sewing room, see this skirt hanging up and exclaim, “something like that!” SkirtSince Debra was using this thrift shop skirt for a refashion to fit her little granddaughter, she gave me a panel.

Easter Purse_1

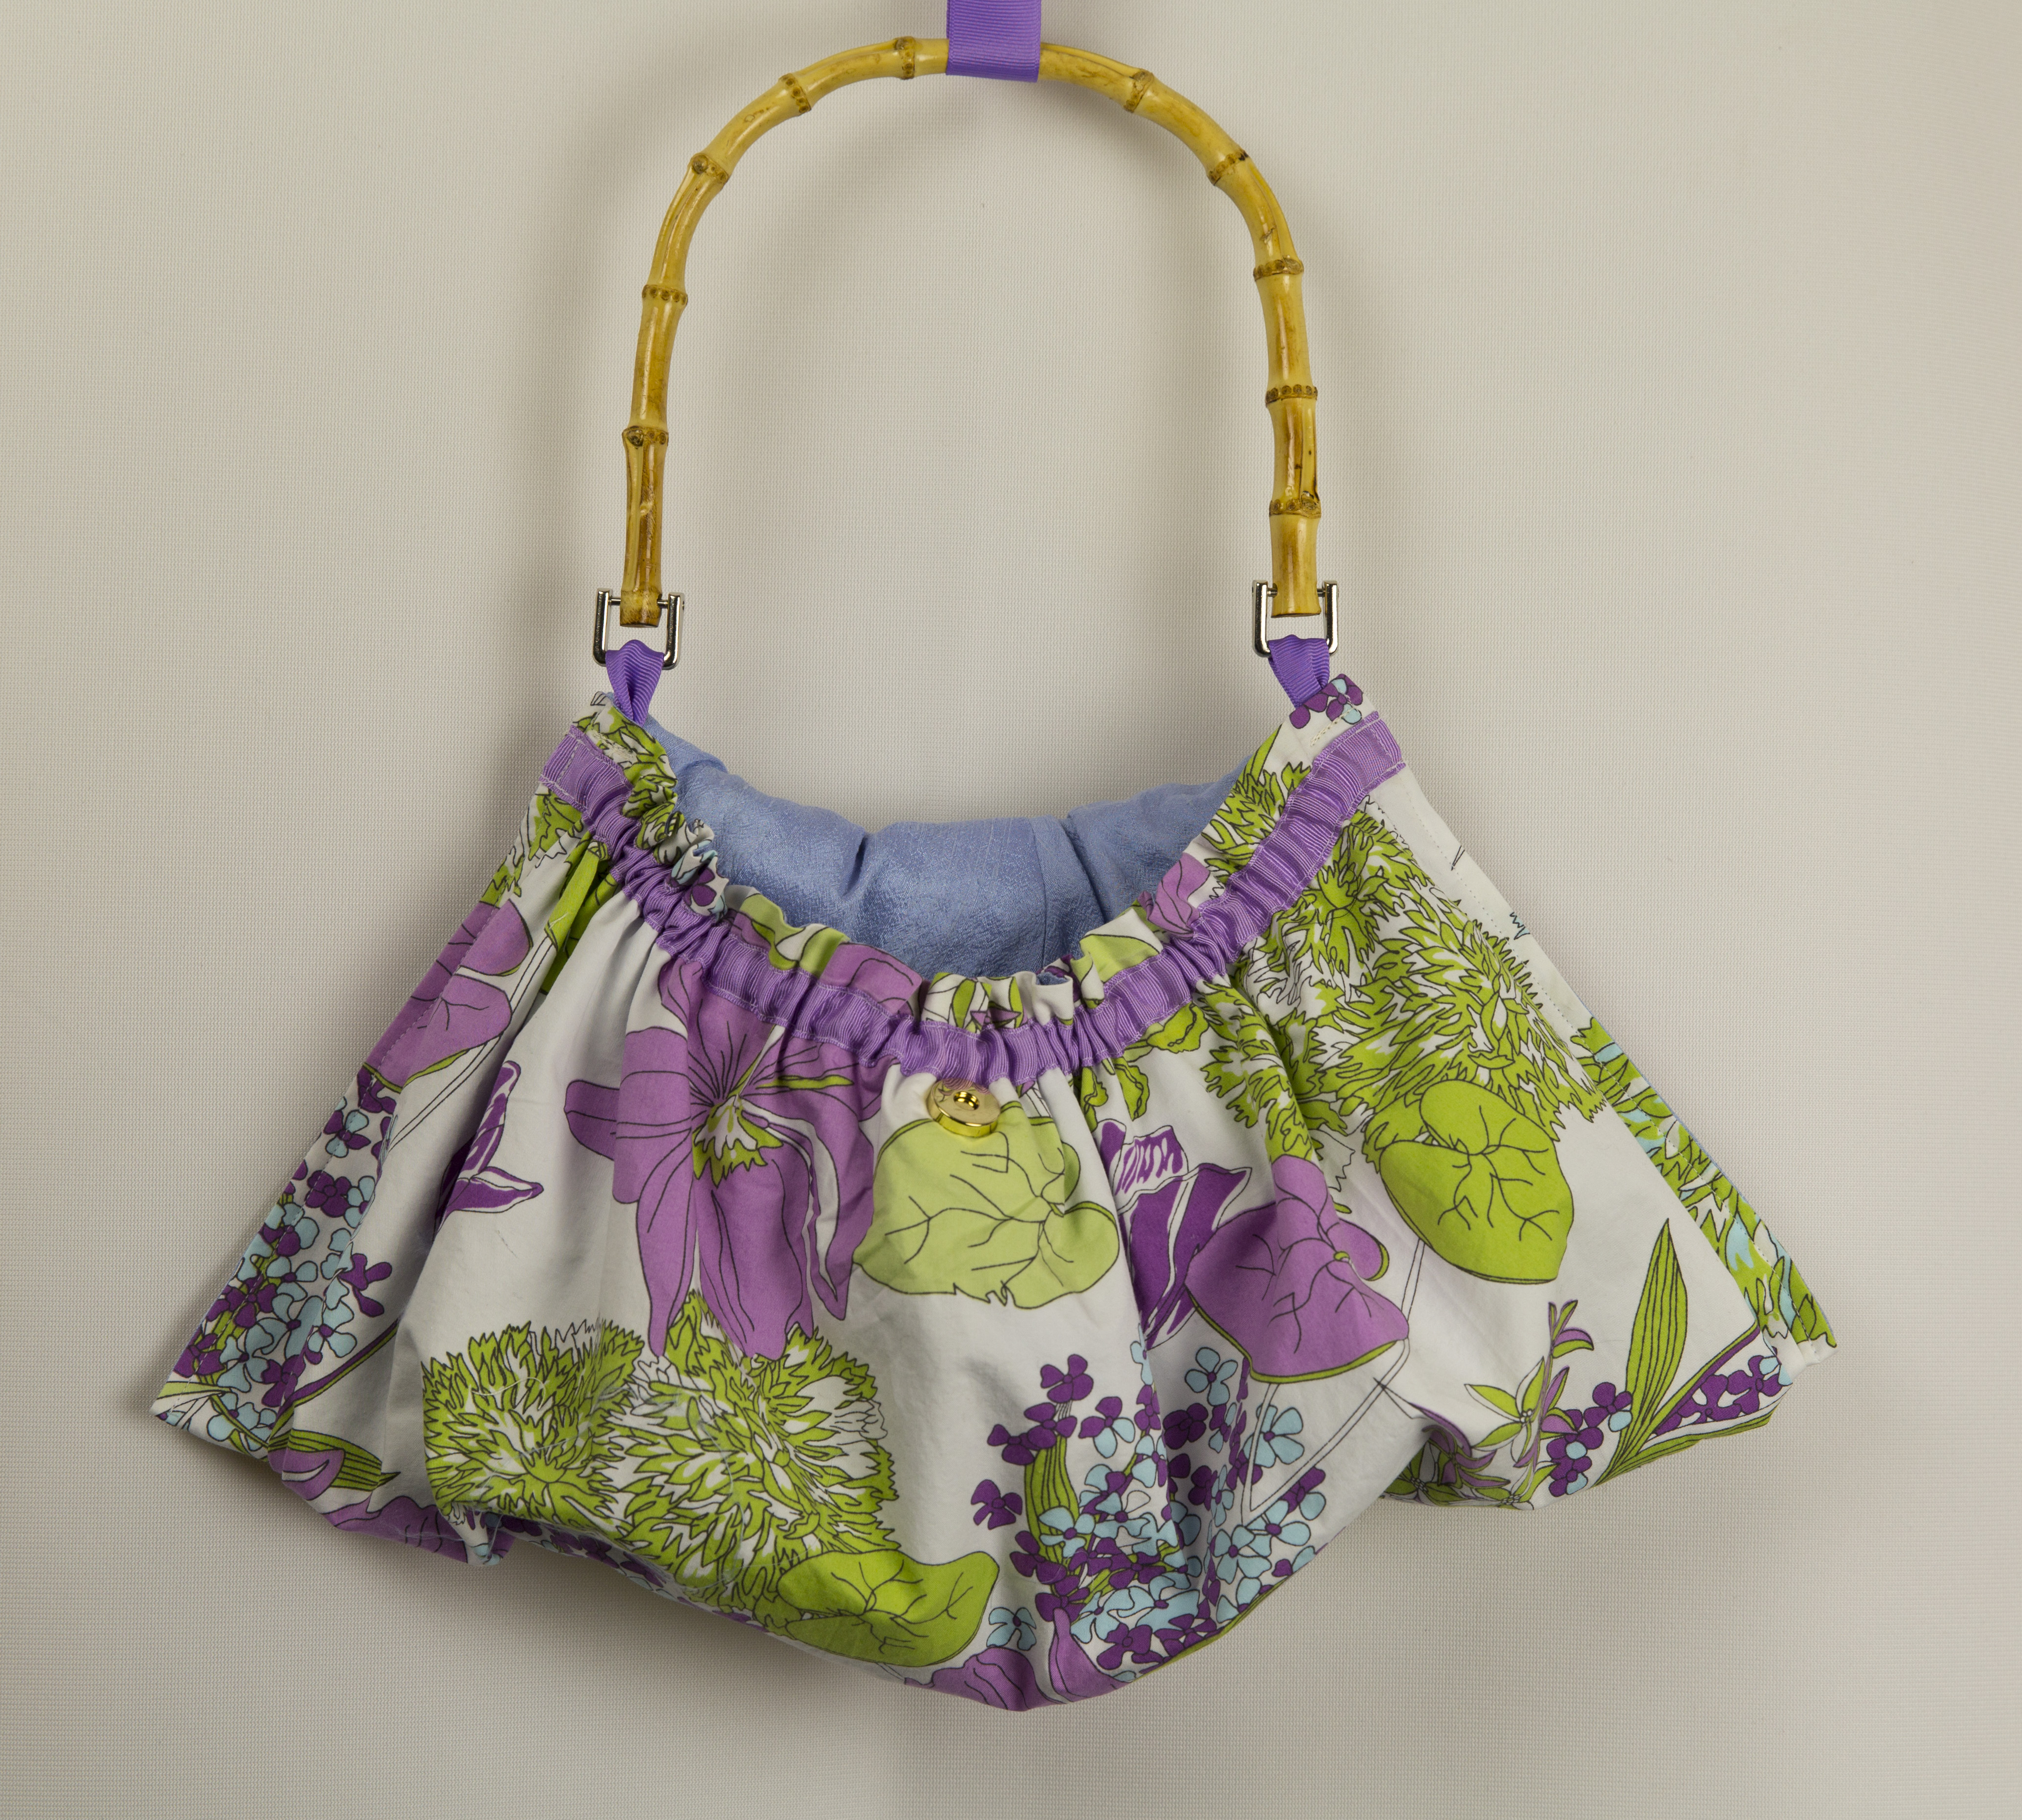
Basically this is just a full length skirt panel that I lined. Then I added the gathering to the wide part (the hem). So the width worked with side seams. Before closing it all up just add a snap, any embellishments, and voilà, a cute special occasion purse!

As an aside, a fellow blogger made a nice courier bag with a leather skirt, the same week as I was making this purse. Check out the post here.

Happy Easter Joan!

Vest Refashion and my BSF

Ever buy something that doesn’t fit, but you keep it anyway? Well that is this vest. I like that it was long, but it’s too long. I love the belted waist, but it unfortunately doesn’t fit my waist! The neck is so small that it doesn’t comfortably fit anyone. At least I liked the fabric and the pockets. So there it hung, alone in my closet, waiting for some 6 foot tall, thin woman with an impossibly skinny neck.Black-Vest-Before

This is what I did:

First I cut off about 10” of length. Then I ripped out the side seams and finished them leaving an open seam under the arm. Shaping the neck into a V solved the neck fitting problem. Then I took the extra hem fabric and made a side panel to highlight the waistband that buckles in the front. At that point it looked pretty good, but I decided that the completely open side made it difficult to find something to wear underneath. My BSF Debra agreed with me.Black-Vest-refashion_3

Time to go shopping in my stash store! Debra and I found this cool laser cut neoprene fabric and that solved the side panel issue and provided a nice contemporary lace edge for the neck. It’s so nice to have a second sewing friend to bounce ideas around. Thanks Debra.

Black-Vest-refashion_1

Black-Vest-refashion_4

Speaking of my BSF, here she is finally appearing on my blog! Debra is modeling her fabulous hand painted shirt. It’s the Lynn Mizono Vogue pattern 1274 that we started together on one of our sewing days. Don’t you love the hand painted black trim? Snap tape hidden under the decorated edge secures the top. Those shoes, copper bracelet and cool glasses…you got it going on girl!Debra-Lynn-Mizono-shirt-web

Refashion Geisha Tunic

Geisha-Shirt3I had loved an old tee-shirt with a geisha asian theme, but alas it not longer fit. I put it in my refashion stash waiting for the right inspiration. A few weeks ago my husband asked if I wanted an old polo of his.  When it turned out a very similar stripe to the background of my geisha tee, I started stash shopping for one more coordinate knit. Vogue 8962 is the perfect pattern since the front panel is narrow and fit my old tee to perfection.

The back pattern pieces are fairly large since the side seem shifts toward the front. The polo shirt stripe and the knit stripe coordinate pieced into a new textile. Then I cut out the back pieces with this new patchwork fabric.Geisha-Shirt

I think the deconstructed net sleeves look great with this tunic. I do have to put my arms through with my hands in a fist so my fingers don’t catch the holes!Geisha-Shirt_1

Testing out some fabric ideas on the neck turned into a solution. I just sewed the strips around the neck and left them twisted and raw. A little hand tacking keeps the neck in place. It’s  great to have my old tee back in a new form!

Silk Charmeuse Shirt Refashion

Silk-Charmeuse-Refashion-FSwebI have seen a number of wonderful refashion projects using shirts to make skirts. I owned a few silk charmeuse shirts that I never wear and then found another at a used clothing store. My fabulous mother-in-law gifted me the black one on the right.Shirts-before-cutting-SI-web First I washed and dried the shirts with the cotton setting on my washer. Yes, hot water and a hot drier! Silk is very strong and I wanted this outfit to be washable for everyday wear. The first photo is of the shirts after washing. Hardly any wrinkles, and if they did shrink then better now than after sewing.

I started by cutting off all of the elements and sorting. The collars in one area, sleeves, cuffs, and the main body parts are each placed in their own pile. The leopard shirt caught my eye and I decided to save the body of that shirt to make into a sleeveless shirt/vest. This photo shows the shirts placed to form bottom of the skirt.Shirts-in-progress-SIweb It’s fun to include some of the plackets with buttons. I decided to use the Taos Skirt pattern from Diane Ericson. It has a simple front and back and multiple ways to make the waistband so I could postpone that decision until later. In the end I decided (with the help of my BSF Debra) to make the waist out of the cuffs from the shirts.Skirt-Back-SBweb The shirt was simple with binding from one of the shirts and a doubled collar from another shirt. I think it will feel great when the warm weather finally hits!Silk-Charmeuse-Shirt-refashion-SOweb

Not just another sweatshirt

Lauren-Sweatshirt-FMwI wear my first sweatshirt refashion so much I decided to tackle another. I started with a very small Ralph Lauren sweatshirt with an awesome military collar. I took the back off again and added it to the front. This time there wasn’t enough fabric in the original sweatshirt to allow for princess seams, but I cut the sweatshirt in a triangle with the smallest part aligning with the collar shape. I think it still has a slimming line on top.

Lauren-Sweatshirt-OMwWhen I tried it on it was still too small on top. Aha, a GDO! (good design opportunity). I took the fabric from the sleeves and added a triangular gusset under the arms. I like the detail it adds to the garment.

Lauren-Sweatshirt-DBwA triangle in the back finishes the line and concept. Overall this tunic is slimmer than the last one and I may even like it better!

Shirt Refashion #2

I mentioned on my first men’s shirt refashion that it came out a bit more formal than I had intended. While I loved the result I really wanted an everyday shirt for spring. This shirt is going in the right direction.Yellow-Shirt-FS

My BSF Debra and I got together to each make another refashioned shirt. She is still promising photos of her pieces, and as usual our two projects look nothing alike!

I started with two of my husband’s shirts that are too large for him. I liked the fabrics, but was hesitant about the color. Shirt-Refashion-2-FSI have red hair and brown eyes unlike most redheads with blue or green eyes. Fall colors look best on me. The light blues, while pretty just looked like an anomaly in my closet. In the end I put the shirt in a marigold dye bath and the result works better for me.

 These shirts are so much fun to make. All the hard parts like the collar and plackets are already finished. The final shirt just needs the panels added to the sides and some details to add some interest.

Yellow-Shirt-Button-Sleeve-D

Yellow-Shirt-Sleeve-Buttonholes-DNotice that the side panels still have the buttons and buttonholes! My BSF gave me that idea from her first shirt.

This shirt looked baggy around my waist, so I added a fabric tie belt. Yellow-Shirt-BSThe pocket is a nice addition for everyday wear. I try to add pockets whenever possible.Yellow-Shirt-Pocket-D

First Shirt of Summer – Men’s Shirt Refashion #1

I am so pleased with this project I can hardly believe it!Shirt-Refashion-1-FHMy BSF Debra and I got together to refashion some men’s shirts. She is going on some warm vacations so needs some new spring clothes now while it is still cold. After looking through our stash of used men’s shirts, I chose a linen shirt. In addition I added a frayed pair of black linen pants and a pair of linen overalls that had never worked for me. While not an absolute necessity, both Debra and I like to include a touch of black in our projects whenever possible to go with our favorite black jeans or leggings. Including your favorite neutral makes wardrobe management so much easier.

Shirt-Refashion-1-FM

I owned a white shirt that had a square poncho shape instead of sleeves. We both used it to get our basic idea for the refashion.Shirt-Refashion-1-BM I promise Debra is going to get me pictures of her projects soon. No one will believe how different our two projects ended up this day!

The men’s shirt is in the center with trim from my black pants and sleeve panels made from the legs of the overalls. Shirt-Refashion-1-FD2The bias tape decoration is made from the overall straps that I just left hanging instead of cutting. Shirt-Refashion-1-BDStill not done, I added some Diane Ericson stencils to one sleeve for balance.Shirt-Refashion-1-FD

While it ended up dressier than I had ever imagined, I am very happy with the end result. So much so that I have already made a second version that is not photographed yet. I usually hate summer clothes, but have high expectations for my warm weather wardrobe.