Where’s Wendy?


I’m here, just spending some January time reorganizing! As interests wax and wane, workspaces also need to adjust. I had a very nice wood and metal workshop in the garage, but most of the summer it was stifling hot and in winter it was way too cold. I rarely used the wonderful equipment my husband bought for me, and I really want to work on some jewelry, and some art pieces.

fabric-photo-room

So after much planning, my fabric stash and blog photo area have moved into our oversize second guest room that isn’t often used. Besides, who wouldn’t want to sleep in a room full of fabric? The previous stash/photo room was stripped of carpet exposing the concrete. Then we hired movers to carry my entire wood and metal shop to the basement room.

woodshop-2


This workroom storage closet houses extra tools and equipment. Then a built-in cabinet holds all the metal supplies and tools. A mega air filter that we bought a few years ago when we had devastating fires in the mountains will keep the air fresh. I already love going to this room and I’m not finished yet. Some pegboard on the walls will help with the functionality of the room. I also plan to hang some of my wood and metal found objects while they are waiting for a project. I always like some of my inspiration to be out in the open rather than hidden in a closet. I’ll post a finished photo in a few weeks after I completely settle in.

metals-area

The worktable is two-sided to accommodate a friend. so my BSF and I spent an afternoon in the room testing it out by making some earrings.  We all have favorite earrings that have lost their mates.

Original-earring

I particularly love this one that is made of aluminum so it’s light, but a very bold shape. I was pretty sure I couldn’t match the aluminum texture exactly, and I wanted to make them into post earrings so they would not fall off as readily.

New-earrings-web

My BSF suggested I take them apart and add a brass piece to each side! Brilliant! She made the same ones from scratch in aluminum and copper. The workroom functioned adequately, but we found a few areas that needed further organization. It’s always good to use a room a bit to refine use and needs, but I’m going to love this space! I’ll post a finished photo in a few weeks after I completely settle in.

Coming up soon: Self drafted pants from a crafty class and a Papercut Patterns Rigel Bomber sewn with my Paris velvet and a snow-dyed lining!

What’s going on?

I have a few things in progress, however I’m making lots of plans for the next couple of months. This week will be an overview of things to come including WIPs (works-in-progress), new fabrics for spring and a couple of light fixtures I’m making for the house. I’m not sure which project is the most exciting!

Works-in-progress

Projects-022115

First I have two projects I’m working on. I want a little more color in my living room. At the same time my yarn stash of leftover skeins is getting out of control. Yep, an afghan of many Wendy colors! I picked a basket of colors that coordinate with my living room and the lime green patio furniture outside the windows. I rib knit a couple of inches and from there on I’m knitting in garter stitch with a very occasional few rows in stockinette. When I get tired of a color I just switch to something different. I’m not even giving much thought to the weight of the yarns other than doubling some of them at times. One end will have fringe from all of the loose ends and I will need to do some finish on the other end. I might bind that edge with suede, wool, or crochet an edge. Sometimes it’s just relaxing to just knit without having to worry about shaping or fit!

Projects-022115_2

The second work in progress is some embroidery with no plans on where I will use it. I love a little handwork now and then, but when I’m almost finished with a project I can’t get myself to wait for a small labor-intensive detail. I’m making some elements to have on hand to enhance a project when I desire. I may even design something just to use these decorative pieces. Shown here is the beginning of three button-hole tabs for a future jacket or blouse.

Fabrics for Spring

My spring wardrobe sewing plans are coming together. I just drafted a classic straight pant that I hope will work well with some of my knits. Then I can modify the pattern to work with the linen pants that I love to wear in summer. Here are a few fabric combinations that I have grouped together to make outfits.

Projects-022115_4Green knit pants with coordinating floral and solid top options.

Projects-022115_7Thin stripe linen pants with a soft rayon challis for a blouse.

Projects-022115_6Lime green linen pants with a cotton lawn shirt.

Projects-022115_5Black linen pants with a red and black cotton and linen blouse and a stripe and plaid seersucker blouse.

I have more rayon challis coming in with some wild prints for a change. I’m normally a fall color person who struggles with spring/summer colors, but I think the upcoming season is looking up on the wardrobe front!

Light Fixtures

Projects-022115_3Then I’m making light fixtures. For several years I have admired the work of lighting designer Lindsey Adelman, but couldn’t afford the fixtures.Adelman-ceiling-light

Adelman-desk-light

Her fixtures run from around $7,500 to 15,000, but she is now offering directions and supply lists for a cool branch series. The kit for the chandelier is $145!!!! I have parts for the You Make it Chandelier, and two of the You Make it Desk Lamps. So Cool!!!!

Yardstick Holiday Tree

full-tree

I finished my yardstick Christmas tree last weekend! I have no idea how many cuts I made or holes I drilled, but I’m sure it took over 12 hours to make. While this is not a tutorial I’ll cover the basic steps in case someone wants to take this on for their own home. I thought of this idea last year and started bidding on yardstick lots from eBay. I collected from 80-100 yardsticks and was able to use most of them. Of course, that was last summer and I had planned on building this in October.

Last week I started by marking the angle of the tree and figuring out the most efficient use of the sticks. Then I used a chop saw to cut all of the lengths. I didn’t even try to keep them in order of length. I recommend drilling the holes with a Forstner bit set up with a jig on a drill press. I tried a regular bit, but the yard stick is too thin and rattled around until the hole was a chewed up mess.

Tree-baseNext year I’m going to modify the base, however the basic idea worked out this year.  I made a few last-minute modifications, which is why there are so many parts. Basically I bolted a galvanized steel pipe to a bucket and then filled it with rocks for stability. I can toss out the rocks after the holidays and store the light weight bucket. This almost worked, but the tree tilts easily and I need more support to keep the center rod straight. I have some ideas…

tree-close-up-3I then organized all the cut yardsticks by length (took longer than expected) and stacked them on a 6 foot piece of 1/2″ all-thread. The advantage of all-thread is the ability to use bolts to make the stack of yardsticks tight on the pole. I then connected to another 18″ piece that slid into the galvanized pipe in the bucket. That means the tree is 7″-6″ tall and about 36″ wide at the base. If I can find a longer piece of all-thread next year, I may add another foot or so at the base to make it even taller and wider!

close-up1I was planning on taking my cordless Dremel and drilling holes for ornaments, but the tree is already interesting enough as is. I found these cool little lights on Amazon and that seems like enough! The whole thing folds flat and is light enough for me to carry it to the basement for storage. I’m going to take a week or so off of posting so I’ll be back the first week of January. Happy Holidays to all!!

Around the World Blog Hop

I was delighted when my sewing friend and fellow blogger Myrna Giesbrecht invited me to follow her on the Around the World Blog Hop. As Myrna explained on her entry, we officially met in the lobby of the Ashland Springs Hotel while attending the Spring DOL. While there was immediate recognition, it took a few seconds to realize that we knew each other solely through our blogs! The same day, my husband and I stopped into a restaurant for lunch and the same thing happened with Gayle Ortiz. I have invited Gayle to follow me next week on the 15th. Both women have wonderful blogs documenting their creativity. In addition, both inspired me to start my blog a little over a year ago before I had met them in person.

The Around the World Blog Hop suggests answering four questions.

#1. What am I working on?

This weekend I finished a mask for the annual fundraiser of the Fort Collins Museum of Art . While I can’t show you the 2015 mask until it gets mounted in the show next March, my art website WendyFranzen.com has a page of masks covering the last 10 years.

yardsticks-web
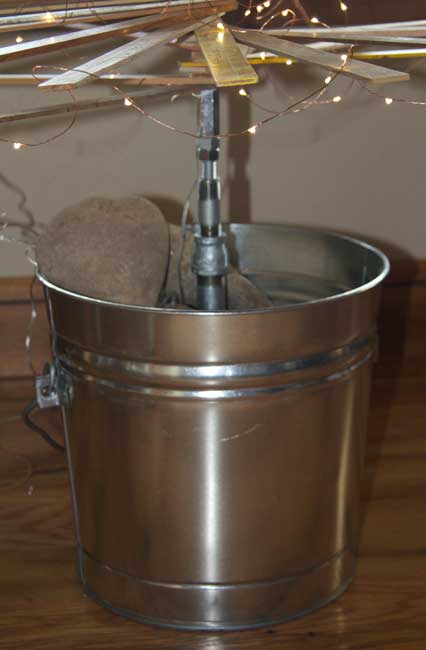
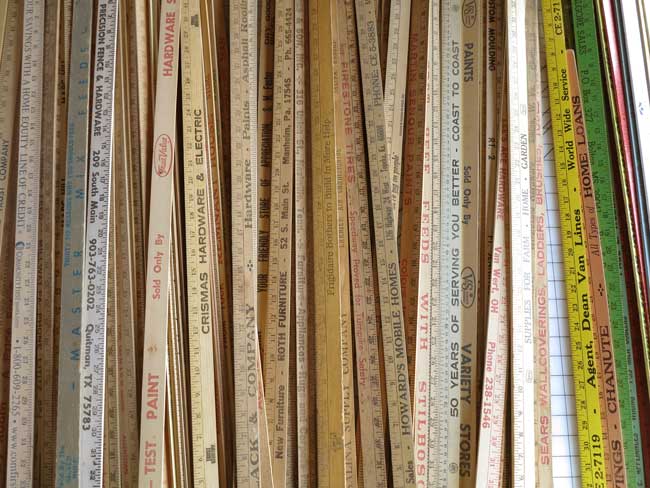
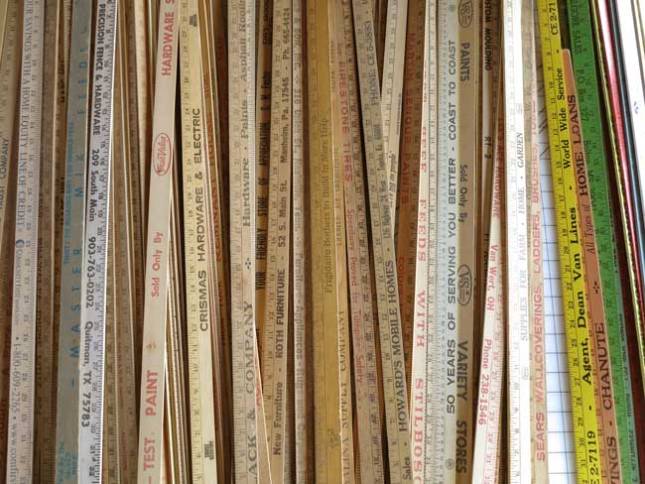
Later today I’m starting an alternative Christmas tree project made of vintage yardsticks that I have been collecting all year. I hope to show it in next week’s blog.

lake-placid-sweater
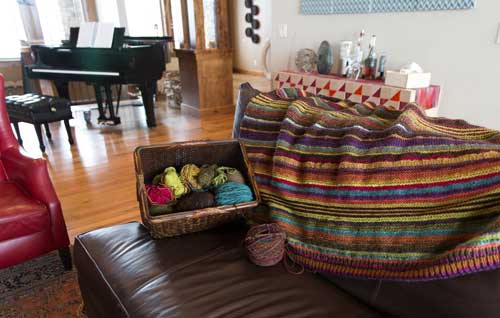
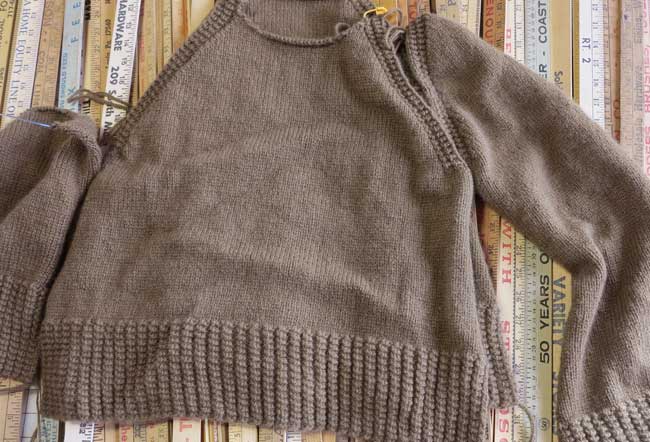
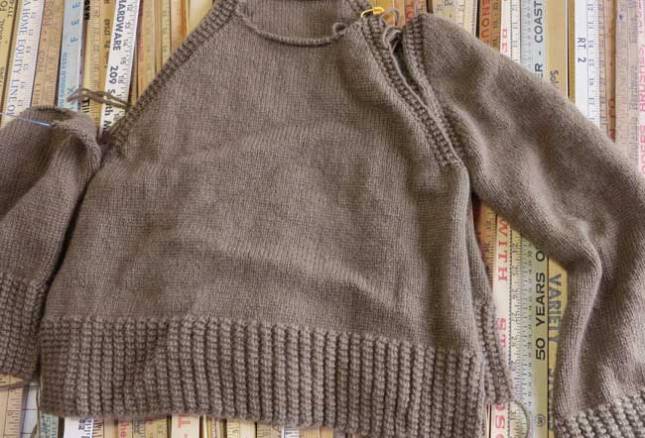
I’m almost finished with the Lake Placid sweater. Of course that’s not the real name, but if you follow my blog you will know that I usually name my project after the most horrible movie my husband picked while knitting. Do you remember the movie? It’s about a mega-gigantic alligator that has found it’s way to Lake Placid New York. Betty White is feeding it cows, and it crashes a helicopter before they catch it. There is no way I could be making this up!

more-fabric
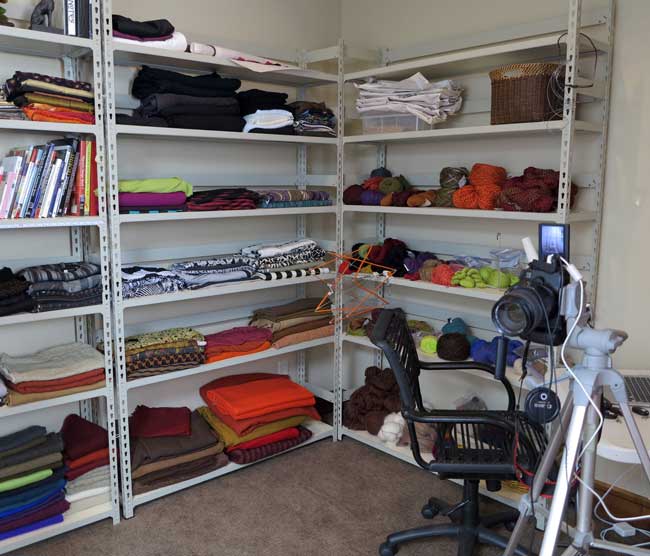
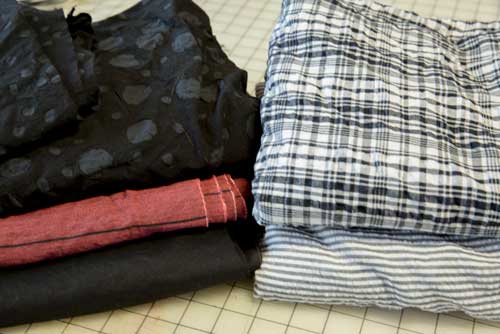
We drove to Dallas to celebrate Joan’s (Husband’s mom) 90th birthday. Some of you will notice that she follows my blog and often writes clever comments. She is a delight! While on the road trip, I bought tons of new fabric at a great independent Dallas area store Fabrique Fashion Fabrics. Then I bought even more in Santa Fe, NM at Santa Fe Fabrics, so I know I will be sewing something in the next few days.

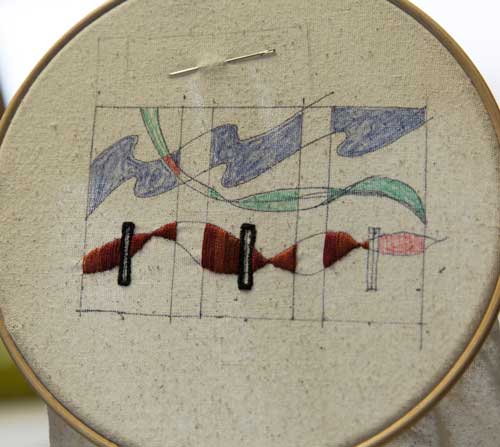
I also have a few Christmas gifts in the works that I can’t show until they are given to friends. Whew! I love having projects going!

#2. How does my work differ from others of its genre?

While I don’t work solely in one genre, there is a universal aesthetic that comes through in my work. My background as an architect appears throughout my work. Math, technology, nature and color all inform my design process. However, I also like to throw in the surprise of something unexpected. This is when I throw process to the wind and try to add a bit of spontaneity to the work.

#3. Why do I create what I do?

I think we all have that one thing that guarantees that we will be happier when we pursue it. My husband is always happier after watching a movie. Yes, a man-eating alligator movie actually cheers him up! If I feel the blues, or pulled in too many directions, I just need to go to my studio. Just looking at my fabric stash or planning a project puts me in a great mood. Creative pursuits define who I am. Wearing or seeing someone else wear a piece that I made gives me much joy.

#4. How does my creating process work?

I’m well trained with 8 years of architecture school and 3 years of art school, so I follow a fairly conventional process.

First, define the problem. Something like I want an alternative Christmas tree.

Second, define the parameters. Where is it going? Does it need to fold up for storage? Is there a specific size or shape needed?

Third, research influences and ideas. This tree is a good form for inspiration.onetwotree-600x400-600x400This one gave me the idea of using yardsticks.IMG_0717I love the Internet! While I did not find a tree that was exactly what I am making, the internet provided the inspiration to go in my direction.

Forth, design the project. Somewhere in the previous 3 stages the idea will gel and materials gathering starts. In the case of this tree it took several months to gather that many yardsticks.

Fifth, make it, but be flexible if an idea does not work exactly as planned.

Sounds easy and methodical, but of course there are moments of both frustration and pure inspiration.

Around the World Blog Hop Next week

Please make sure to check out Gayle’s blog: http://gayleygirl.blogspot.com. She is an inspiration to me and many other sewists, and is one busy woman. She owns a bakery and rosticceria/café that opened in 1978. Locals have told me that this is not simply a bakery, but a destination not to be missed! In addition, she’s on her town planning commission, so I have no idea how she manages to sew. Like many of us, she learned to sew as a young girl and has only started again in the last 10 years when she travelled to New Zealand and learned a sweater reconstruction technique from a very creative gal. She sews art clothing and everyday clothing occasionally for sale but mostly for herself.

Blogiversary!

Studio-from-houseFor my one-year blog anniversary I completely rearranged my studio space. It’s always interesting when a remodel works so well that the room seems more spacious even though I added one piece of furniture. I am lucky to have such a great room to start with. The previous owners built this room as a sun room, so the light is fantastic. The room arrangement is a mixture of inspiration for design and practicality for working.

The room can get too bright in the summer afternoons, however the blinds work well. My cat loves sun bathing in her new cat tree, the one new piece in the room.Mount-IchiThe only other issue is an almost complete lack of wall space. Storage and workspace in the middle solves that problem. I put a coat hook on the back of the glass doors so I have a place to hang and show off my work. The two work areas, sewing/making and computer, are now at the back two corners with shared storage along the back wall.

Studio-1

The cutting and ironing table has enough storage for all kinds of supplies including paints, stencils, and fabric that I’m currently using. Studio-2My favorite piece is this old library file.Library-file2 I lined the old drawers and use them for all kinds of parts and pieces. Library-file
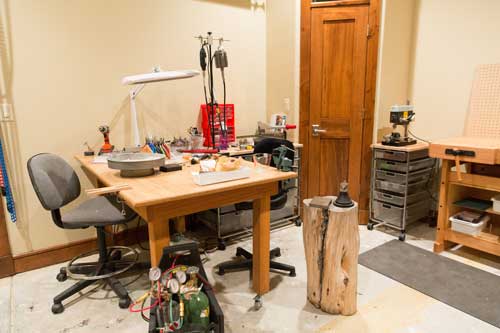
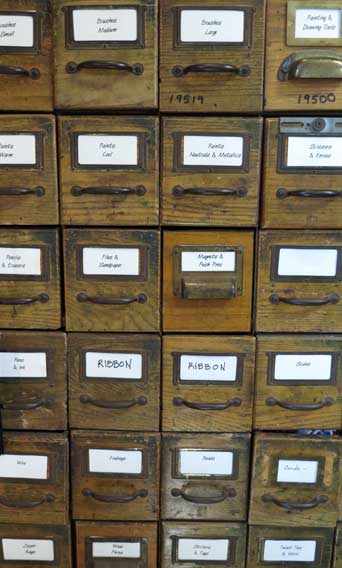
The cubbyholes above hold a jumble of mementos including a number of squirrels. Did you know I have a thing for squirrels?Cubby-Holes

Needless to say one of my favorite parts of this room is the fireplace, two comfy chairs, and another collection of inspiration elements.Studio-Fireplace It’s a great place to do hand stitching or visit with my husband or BSF and a cup of coffee. The kitchen is right outside the room, so water access and snacks are close. Wow…the more I describe this room, the more I can’t believe it’s mine!Studio-Sunset

Fabric “Store” and Photo Studio Remodel

Fabric-Storage1

While other people like to spring clean, I went to school for so many years that I’m still hooked on a late summer back to school schedule. When the notebooks and pencils start showing up in the stores I want to straighten out my drawers, closets and work areas. We rearranged some rooms in our house leaving a small windowless “bedroom” that I could use to store my fabrics, yarn and set up some lighting for photography.

Previously my fabric lived in 3 different areas and I had no idea how much I owned! This stash may be too much to some, but I just love looking at those shelves of delicious fabrics in my favorite colors. Fabric-Storage-2The top left shelf has some lovely African batiks that I inherited, along with my silk and metallic fabrics. Sewing and knitting books also have a space here, and there is room to grow! The next shelf two shelves below the books are woven textiles. The shelf to the right is all knits except for more wool on the bottom shelf, and some leather rolled up on the top.

yarn-winder

My yarn stash is not nearly as large, and many of these are leftovers from previous projects. I have a different approach to my knitting than my sewing. As I near the end of a project I usually, I go to ravelry.com and look at patterns that I have favorited (I’m sure this word will be accepted in the dictionary soon.) in the past or research something I want to make, for example a new winter hat. Then I go to my LYS and pick out the yarn.

refashion-stashThe next area in my room is for my refashion stash. These are clothes that I have picked up at resale shops, or items from my closet that I no longer wear, but love the fabric or a detail. The upper left bin is all linen items. The right side box contains cashmere sweaters from my husband, myself and resale shops. Wash and dry them in the machine and they shrink up to a yummy softness. Moth holes virtually disappear, and I can then sew them into a new garment. Lights-and-Backdrop

The photo studio is the last wall in this room. I’m at best a hobbyist at photography, but the new bright lights and pull down backgrounds should help with the post processing that I did previously to make up for low spotty lighting. I haven’t had time to test out the photo area, but I’m currently sewing two new tops that I will photograph for my next blog.

A Fix-it Tutorial

My blog is slowing down, but I’m not. The problem is spring-cleaning! My husband and I are running errands like crazy people.

Here is a little tutorial from a spring-cleaning project. I needed to repair the frayed cords to my phone and I-pad. I use these devices so much that they get bent and frayed. My favorite product is Sugru. I buy it through Amazon, but I’m sure it is available in other places. This stuff is magic. They should be paying me for this plug!frayed-cord2

  1. Here is the frayed bent cord. It’s bent for a reason…that’s the way it always falls when I’m using it. Make sure it still works in this position if you want to keep it bent.Sugru
  2. Buy Sugru. It comes in colors, but I ordered white for simplicity. Even the small packs fix several cords so get out a few projects to fix. The stuff sticks to just about anything so be creative. Note that it does have a “use by” date that is for real, so buy sparingly.Fixed-Cord
  3. Pinch a bit of it (it’s very pliable) form it on your cord and let it dry for 24 hours. I used mine after 8 hours and it was cured enough for use.