The Big Blog Post

IMG_1168

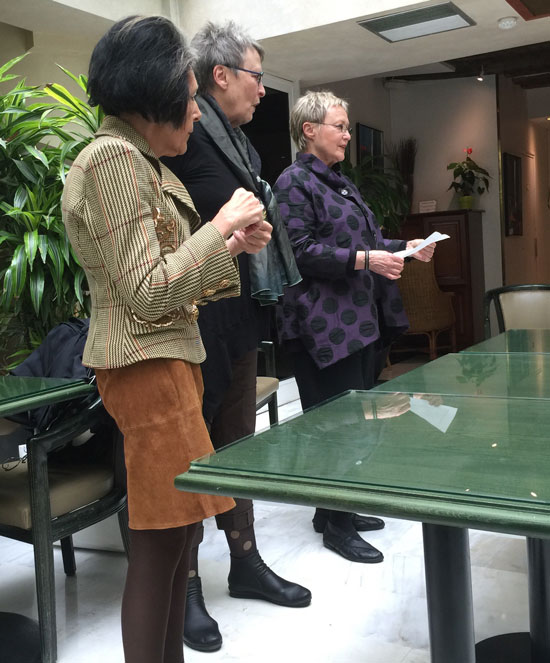
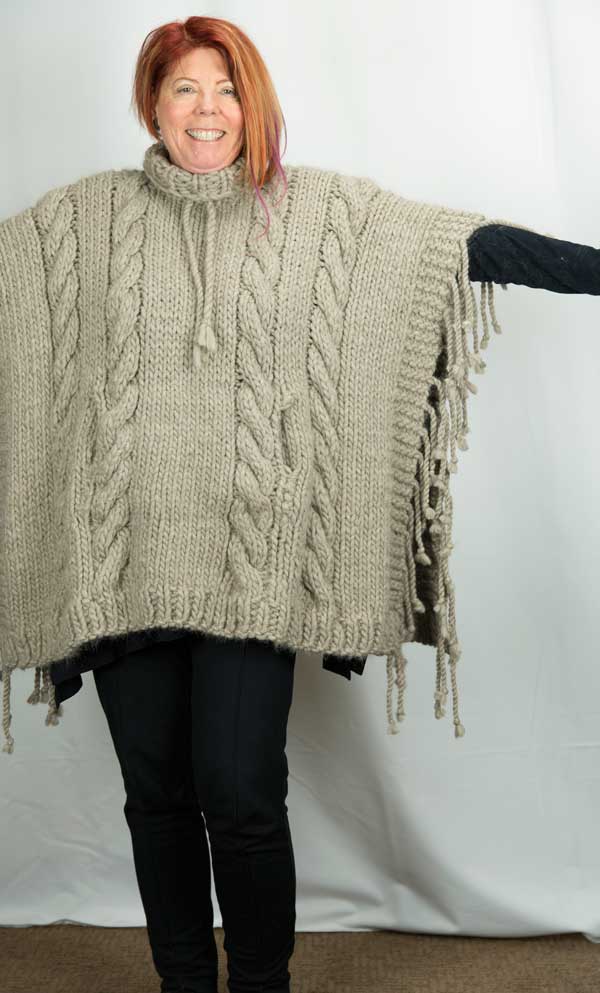
Have any of you promised to make something for a fashion show and sale? If you have, you know how it can strike fear, excitement, and designer’s block! Last January, 8 local sewers were asked to donate their talents to design and sew clothes for the benefit show ArtWear in Fort Collins. We were given beautiful Kantha quilts that had been hand stitched by women who were saved from sexual slavery in India. The clothes that will be modeled at the October 20th fashion show (tickets at lactix.com) and sold October 20th-28th will benefit both these women and the visual arts in town.

Meeting these other sewers was absolutely delightful. The cool ideas were flying every time we met, and I have learned so much from them. I hope to take some photos at the fashion show and show you the diversity of designs that were produced. Each quilt was only about 36″ x 80″ and most items were made with only one piece. In addition the quilts are reversible so we tried to make the pieces reverse whenever possible. I had the task of making an entire outfit for the finale so I did get to play with 3 coordinating quilts  for the whole ensemble.

Thank goodness, my BSF Debra was one of the other sewists so we could bounce ideas off of each other. We bought a few quilts from ETSY to practice on first. I made a pair of palazzo pants, and Debra made this fabulous jacket. Did I mention that these quilts feel great on?IMG_0215

My first two items were fairly simple, but with these fabrics sometimes that’s best. This vest is a whole cloth with the arm openings placed asymmetrically.IMG_0113

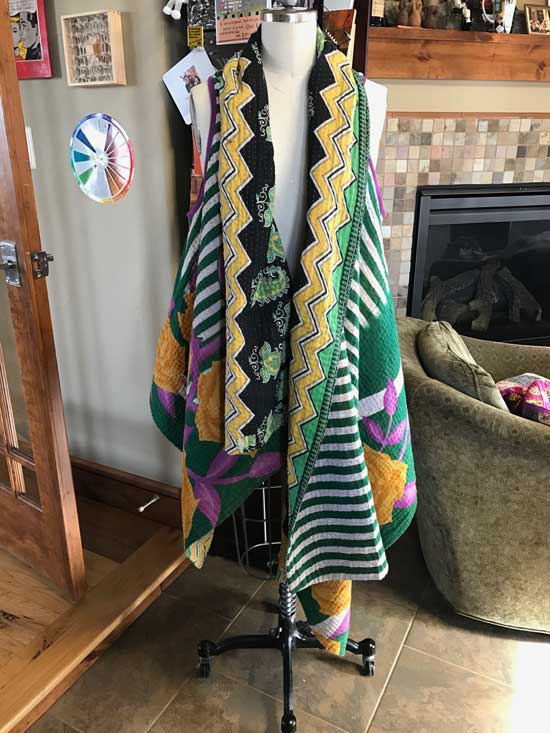
This piece is an almost no waste kimono jacket. At the end of the post I’ll show some of the accessories we made with the few scraps left.
IMG_0111This next piece I may buy for myself! I just love the colors and the fun polka dots on the reverse. We used the finished edges of the quilts when possible, but sometimes used binding when needed. Most of the seams are flat-felled.IMG_1136


IMG_1144

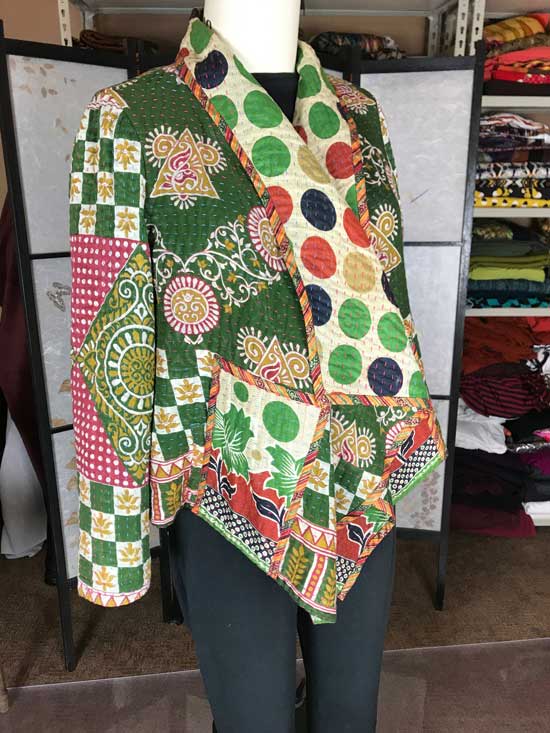
I also found this matching ribbon for the back seam.
IMG_1138

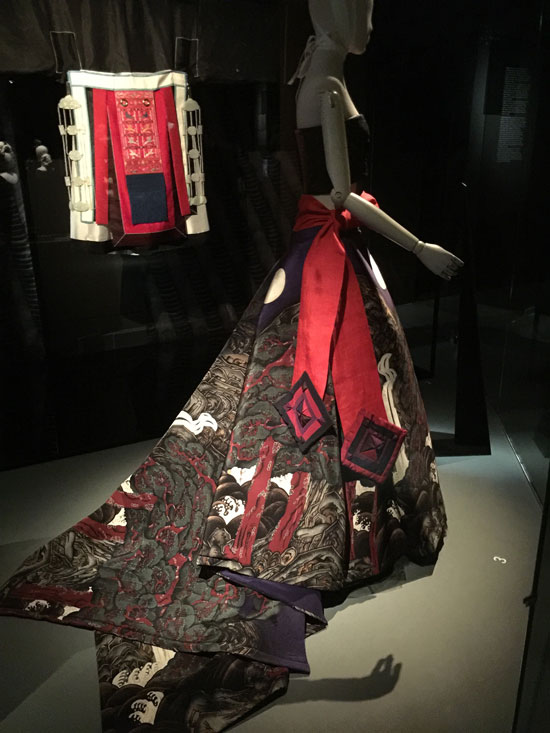
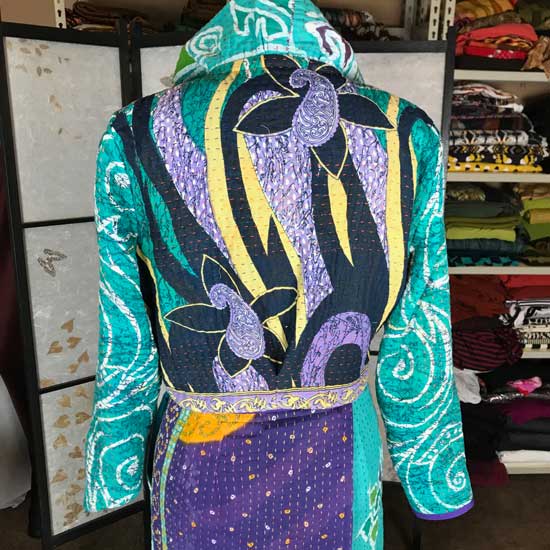
The final piece has palazzo pants, a bustier (my first) and a wild reversible jacket.

IMG_1149

IMG_1168

IMG_1167

This is the jacket reversed. You can see that the back tail has buttons and can be removed for a more casual cropped jacket. I might like this side even more than the matching one.

IMG_1176

The jacket with the tail removed.

IMG_1187Finally here are a few of the accessories made from the scraps and they are all reversible.

IMG_1124IMG_1126

IMG_1120IMG_1122

IMG_1130IMG_1129

The One with the Built-in Scarf


scarf-top
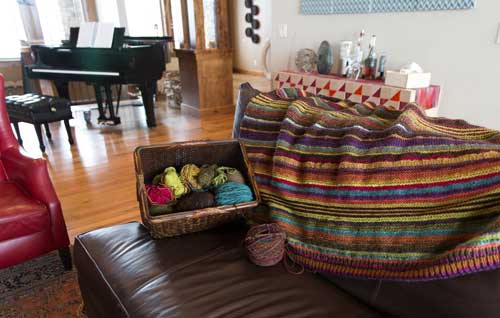
I’ve been sewing but in such small periods of time that I never had time to photograph and blog. It’s amazing how much can be accomplished with an hour or two here and there, but I find it very inefficient. Each time I have to review what last happened with the project before proceeding to the next step. The holidays are coming up and I need to switch gears to gift giving projects, but for now I’ll try and catch up on what has been on my sewing machine for the last month, and it’s going to take a few photo sessions and blogs to cover it!scarf-top_2

I fell for view B from V1516 by Tom and Linda Platt. I call it “the one with the built-in scarf”. With all of those edges there’s a lot of finishing, but I think it is very pretty and dressy, but still comfortable. I can’t remember where I bought the main fabric (money’s on MarcyTilton.com), but it’s probably a rayon crepe. It pre-washed beautifully, but I will be gentle with it now that it’s sewn up. The wool and silk floral layer is from a beautiful scarf I bought during the Taos retreat, with the intention of cutting it up for yardage.

scarf-top-detail

I’m pretty proud of the edge finishes. I buy bias ribbon from Dharmatrading.com and then throw it in the batch whenever I’m dyeing fabric. It comes in handy for anything from wrapping presents for special people to using it for edges like a Hong Kong seam or the hem finish.

scarf-top_4

I’m wearing pants that don’t quite match, but I have enough fabric left to make a pair of pants as soon as I decide which pattern to use. I’m thinking of going back to my pants sloper to make a classic trouser pattern. The Craftsy class covers the modifications, but I need to get the sloper out and follow that chapter. Sounds simple, but we’ll see when I get time to do that. The top and soft pants would make a lovely holiday outfit.

Summer Top

First of all, let me thank all of you for the kind words about my dad. The sewing community is so thoughtful and encouraging, and you all cheered me up more than you imagine.BlueGreen-Lawn
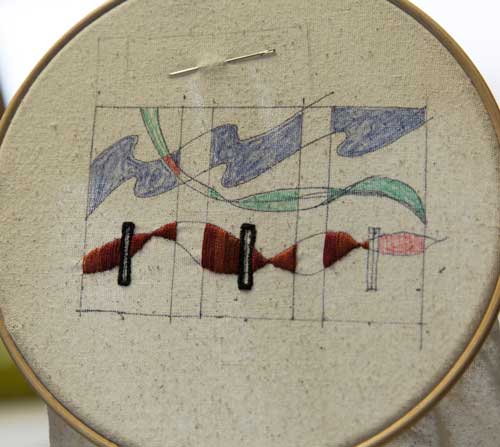
I’m back to sewing and blogging! Summer always poses wardrobe difficulties since fall is my favorite season in both colors and weight of fabrics. I’m determined to have a summer wardrobe one of these years, but while I started planning summer sewing in February, life got in the way. I have a spring coat that I’m still working on, but it’s a long slow project that I’m savoring so it’ll get done sometime soon. Hint: machine embroidery is involved.

In the meantime I made this self-drafted (from RTW) pattern that has promise for the second iteration. Not that this is a wadder, but the cotton lawn I used doesn’t have the right weight or drape. The shirt needs something like a rayon that is less airy. In addition I will make the shirt about 2″ longer next time.

BlueGreen-Lawn_2
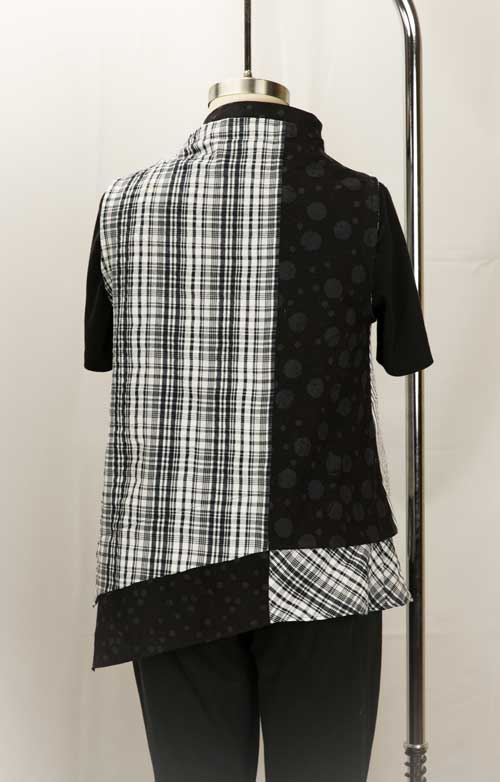
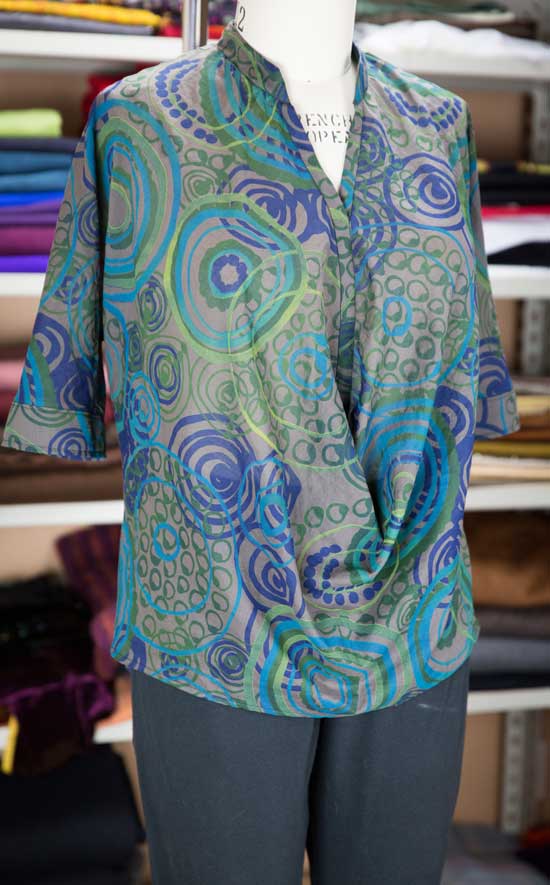
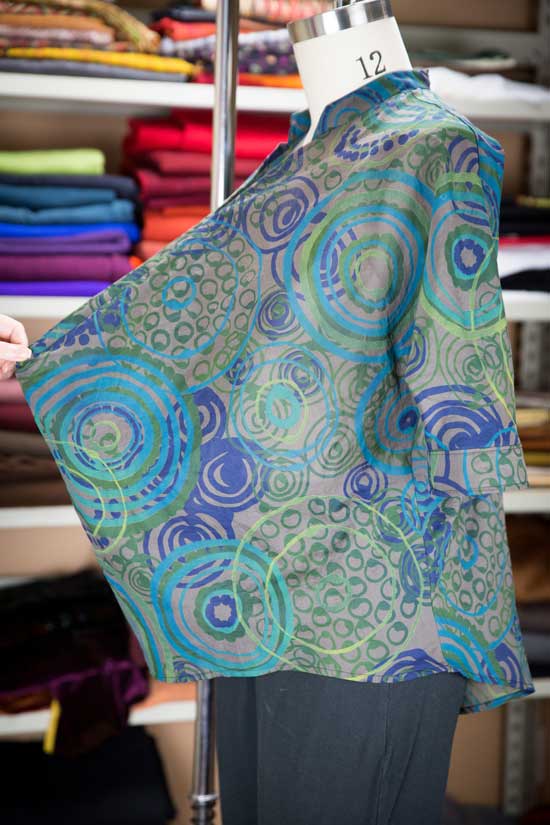
Isn’t this an interesting idea? The front basically ends up on the bias at the placket. Drafting this pattern was difficult, since the original shirt kept shifting around. This front idea is what I wanted to capture and beyond that, I made quite a few detail changes from the original.BlueGreen-Lawn_1 
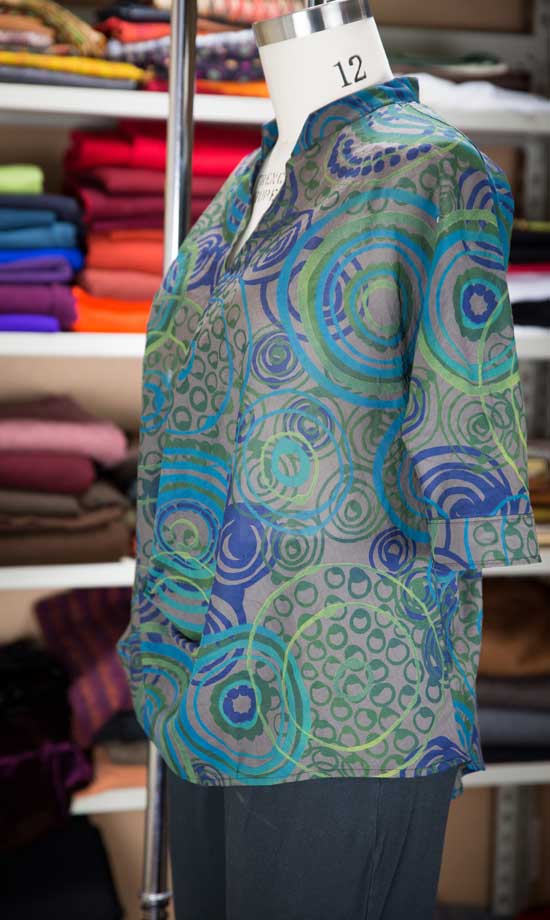
I may add some false buttons on the placket. I usually sew plackets up even on RTW that I’ve purchased. I’m just more comfortable knowing I don’t have to watch out for gaposis at the bust!The back pleat adds to the airiness of this top, which you barely feel while wearing. I find it slightly disconcerting and as I said before a little more weight to the fabric will feel better. I am wearing this “muslin” but I think there is great potential in the future. The body pattern is only two pieces so there is room for fabric play. Hope I have time this summer to make another!
BlueGreen-Lawn_3The back pleat adds to the airiness of this top, which you barely feel while wearing. I find it slightly disconcerting and as I said before a little more weight to the fabric will feel and look better. I’m wearing this “muslin” but there is great potential future iterations. The body pattern is only two pieces so there is room for fabric play. Hope I have time this summer to make another!

Match it, Match it good!

I finally finished the plaid shirt! I’ve never spent so much time on a project with this inexpensive of a fabric, but I’m glad I did. I posted my hopes and intentions on my last blog. That sure put me on the spot, and I needed to follow through. May not do that again…

IMG_2307
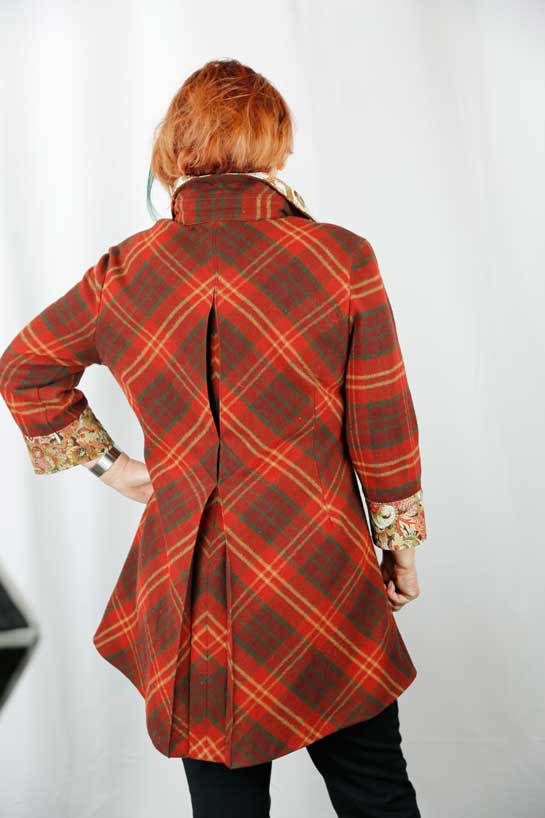
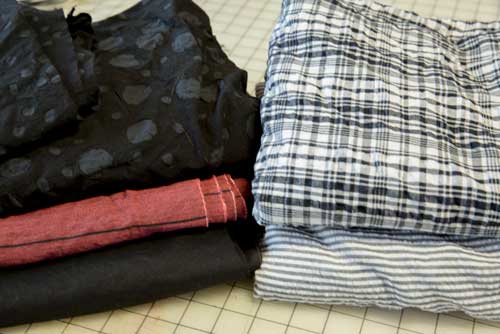
To add complication, I decided to make a pattern from my favorite shirt shown on the left. There are two of these are in my closet in different colors. I’ve only drafted a pattern a few times, and never with a complex piece of clothing (darts, pleats, placket, pockets). The drafting went well, but the first muslin was too small. I know it looks great on Roxanne, but she is the size I want to be. LOL

IMG_2305

After adjusting the pattern I jumped right in without a second muslin. Frankly, I couldn’t wait to post this, but a few fitting adjustments still need to be done on the final shirt. The changes then need to be documented on the final pattern for next time, and there will be a next time!Plaid-shirt4

Referring back to the last post, most of my stated design goals were accomplished in the shirt. Two related coordinating fabrics are used to break up all that plaid. My new embroidery machine performed flawlessly, and I smile at the unexpected fine embroidery on the casual flannel fabric.Embroidery DetailThe final desire was an interesting back pleat, and on the diagonal. The uneven plaid was tough to match in back, but at least I avoided matching the sides.Plaid-back

However, the sides came out well despite my not even trying. Don’t you love it when things just work out like that? Is this what you expected after reading my first blog?Plaid-back-side

Adventures in Italy and France with my BSF: Part 2 Paris

The second two weeks of our trip were in Paris. Of course, this was before the terrorist attacks. Paris was colorful, lively and simply a delightful place and we are all hoping for a return to it’s former self soon.

We wandered the first day and caught up on a little sleep before taking a cooking class the second night. The food in Paris is great everywhere, from small café, to street vendor to restaurant. There was a lot of walking on our tour, which was a good balance with lots of eating and wine!

Monkfish-with-Ratatouille

Monkfish on a bed of ratatouille at our cooking class

Marcy and Katherine Tilton were knowledgable and fun guides who planned an inside tour for our group. The very first afternoon we had an introduction to their friend Dominique who brought in examples from her exquisite collection of little black dresses.

Dominique-Marcy-and-Katherine

Dominique, Katherine and Marcy at our introduction meeting.

There is no way to cover all of our experiences in a post, but a few of the highlights were the couture flower maker…

Couture-flower-maker2

Each Petal is hand dyed then hand formed with heat and wax with special tools.


the Korea Now! exhibit at the Musée Les Arts Decoratifs-Mode et Textile…

Korea-show

Contemporary gown with a traditional Korean influence


the Alber Elbaz-Lanvin exhibit…

Lanvin-exhibit

Sweater knit by me, upstaged by some fabulous draping on the mannequins

Giverny in the fall…

Giverny-in-the-Fall

Monet’s pond at Giverny

and then Monet’s water lily rooms at the Musée de l’Orangerie…

Debra-and-I-at-l'orangerie

We’re wearing the clothes we made!

and of course SHOPPING! both window and…

real!

This is just some of the purchases. My cat doesn’t want me to sew the scrumptious silk velvet.

The best thing? Being greeted with a beautiful bouquet of roses and a hug when I walked into my door!Welcom-Back-Roses

Diane Ericson’s Ashland Vest

Ashland-Vest_1It’s always a treat to make a pattern designed by Diane Ericson, and the new Ashland Vest is no exception. Her patterns are just more than a typical pattern. More creativity, more ways of sewing up the project, and more detailed options to use on this pattern or others. Each pattern is a lesson in sewing and finding one’s own voice, and not just copying Diane’s work. She encourages fearless creativity, and with those thoughts in mind my BSF and I opened up the pattern last week.

After taking a good look at the pattern and dimensions we decided to make a medium, and I think that was the right choice for us. Another might want a roomier feel and make a large. We also chose to use the front piece with a dart. Thanks to Diane for providing this option! I went to my stash and found two wonderful woven Japanese cottons and then a lovely brick-red striped linen for the lining. The Japanese cottons are different but beautiful on both sides, so that made 4 coordinating fabrics! In addition I turned them 90° to emphasize the differences.Ashland-Vest_4

BTW, the cottons are a dark brown and the linen has a black stripe. They look great together! There’s no need to get out a magnifying glass to match colors.

The pocket is exactly from the pattern, and there are no alterations except in the lapel. One pattern option is a wavy edge fold-over lapel exposing the lining. When finished, my stripe produced an optical illusion and the wavy edge just looked crooked rather than wavy. I had trimmed, clipped and pressed, and eventually decided for more wave. The shoulders were now finished so I couldn’t easily go back in to sew stronger curves at the seam. I was almost out of the linen (a bias strip would have worked well), and no other fabric looked good. Ashland-Vest-DetailPlan B, I made several matching strips from the leftover linen (there are seams to make it long enough). Then I serged a rolled hem on each side and slightly gathered the strips.  I placed the desired curves on the lapel and stitched it down to the edge. Great…a tailored vest with a ruffled edge. Didn’t work for me. I then just stitched down the loose edge so there is more structure. I like it, and in fact now think the bit of pucker adds a strong edge to the lapel.Ashland-Vest

Summer Clothes are Here!

Katherine-top_4

My BSF Debra has been pushing me (I needed the push) to start on summer clothes. There are several patterns we have wanted to try, so we pulled them out and chose Butterick 5891 by the uber talented Katherine Tilton.

Side Note: My BSF and I are going on a tour of Paris in the fall with Katherine and Marcy Tilton! We’re so excited!!!!

Both of us agree that this is NOT an easy pattern (as stated on the pattern envelope). A typical shirt would have from 4 to 8 pattern pieces and this pattern has 15! Then there are some funky folds and an unusual collar finish. Top that off with 3 different fabrics and this baby took several days to finish.Katherine-top_3

It seemed early in the season to make a sleeveless shirt, but I solved that by making the arm opening a little larger so I could wear this as a vest or shirt.

I made a muslin and added a dart for my very first time! The dart came out fine, but will be better next time. I need to perfect this skill so woven tops fit correctly. The size I choose was to big on me (despite the muslin). This pattern doesn’t have full length side seams to adjust fit, but it does now! Not an afternoon project, but it did come out pretty cool in the end.Katherine-top_2

I’m very happy with the project, and it will feel great on a super hot day.  Several fellow bloggers have made fabulous versions of the jacket, sometimes as a jacket, vest or shirt. I may have to make that one very soon. Katherine-top_1

What’s going on?

I have a few things in progress, however I’m making lots of plans for the next couple of months. This week will be an overview of things to come including WIPs (works-in-progress), new fabrics for spring and a couple of light fixtures I’m making for the house. I’m not sure which project is the most exciting!

Works-in-progress

Projects-022115

First I have two projects I’m working on. I want a little more color in my living room. At the same time my yarn stash of leftover skeins is getting out of control. Yep, an afghan of many Wendy colors! I picked a basket of colors that coordinate with my living room and the lime green patio furniture outside the windows. I rib knit a couple of inches and from there on I’m knitting in garter stitch with a very occasional few rows in stockinette. When I get tired of a color I just switch to something different. I’m not even giving much thought to the weight of the yarns other than doubling some of them at times. One end will have fringe from all of the loose ends and I will need to do some finish on the other end. I might bind that edge with suede, wool, or crochet an edge. Sometimes it’s just relaxing to just knit without having to worry about shaping or fit!

Projects-022115_2

The second work in progress is some embroidery with no plans on where I will use it. I love a little handwork now and then, but when I’m almost finished with a project I can’t get myself to wait for a small labor-intensive detail. I’m making some elements to have on hand to enhance a project when I desire. I may even design something just to use these decorative pieces. Shown here is the beginning of three button-hole tabs for a future jacket or blouse.

Fabrics for Spring

My spring wardrobe sewing plans are coming together. I just drafted a classic straight pant that I hope will work well with some of my knits. Then I can modify the pattern to work with the linen pants that I love to wear in summer. Here are a few fabric combinations that I have grouped together to make outfits.

Projects-022115_4Green knit pants with coordinating floral and solid top options.

Projects-022115_7Thin stripe linen pants with a soft rayon challis for a blouse.

Projects-022115_6Lime green linen pants with a cotton lawn shirt.

Projects-022115_5Black linen pants with a red and black cotton and linen blouse and a stripe and plaid seersucker blouse.

I have more rayon challis coming in with some wild prints for a change. I’m normally a fall color person who struggles with spring/summer colors, but I think the upcoming season is looking up on the wardrobe front!

Light Fixtures

Projects-022115_3Then I’m making light fixtures. For several years I have admired the work of lighting designer Lindsey Adelman, but couldn’t afford the fixtures.Adelman-ceiling-light

Adelman-desk-light

Her fixtures run from around $7,500 to 15,000, but she is now offering directions and supply lists for a cool branch series. The kit for the chandelier is $145!!!! I have parts for the You Make it Chandelier, and two of the You Make it Desk Lamps. So Cool!!!!

Heartfelt Vest

Heartfelt-Vest_16I bought this amazing fabric at Allyn’s Fabrics in Denver. This store has been there forever. To give you some idea, the current owners bought it almost 45 years ago. I’m pretty sure some of the fabric is old and priceless. You have to dig while praying that the bolts at the top touching the ceiling don’t come down on you. In some areas my BSF and I needed to use our cell phones as flashlights. The staff is very friendly and it is a must stop in Denver.

I bought two pattern repeats, and proceeded on the search for the perfect jacket/vest design to show off the green border. Finally, it dawned on me that this fabric speaks for itself. I need a versatile pattern with simple lines, allowing me to make decisions on the fly. Diane Ericson’s Heartfelt Coat to the rescue! This is the same pattern I used on my first ever blog post. That hand-pieced fabric had the same requirements of simplicity with options.

Heartfelt-Vest_4After making the basic shape I spent a day making sleeves and then taking them off and adding a simple band to finish the arm opening. Then I played around with a button/ large snap closure that was too heavy for the (mystery) textile. I removed the button and heavy snaps, and added lighter snaps.

Heartfelt-Vest_1Heartfelt-Vest_5Finally I explored collar options. This multi layered bias collar is also a Diane technique. I love having a good stash and the hand-dyed green organza was sitting on a shelf just waiting for the perfect project.

Heartfelt-Vest_2

The fabric isn’t stable enough for the pockets I hoped for, so I still have a few scraps of fabric and the unused button. I plan on making a little matching purse in the next few weeks. I also have a lovely green knit slated for a pair of pants to coordinate with the vest.

Happy Valentines Day to all!

The story of the $1300 Poncho

$1300-Poncho_3Snoop shopping is fantastic in Santa Fe, New Mexico. Long gone are the days of coyotes with bandanas! Designer labels and art-to-wear where abundant when my husband and I were there last Thanksgiving. At Santa Fe Dry Goods, I had great fun trying on Issey Miyake jackets. Then I discovered Sophi Hong who uses mud dyed silk for her luscious coats and jackets. I used a few of her little details on my recent black shirt like the stitches on the placket indicating snap locations.

My generous husband bought me a number of fabulous things at some of the other stores (I guess I’m not going on a ready-to-wear fast anytime soon). Then at one store I spotted a big pile of knitting on a lower shelf and pulled it out. It was a soft, squishy, lovely, yummy big armful of yarn that turned out to be a big poncho with a pouch pocket. I was in love, and slipped it on…more in love. Cashmere I asked? No, it was 50% alpaca and 50% merino and it was hand knit AND 1300 dollars! I eyed it up for a minute and folded it back up. I can make that I thought to myself.

$1300-Poncho_6

How often we say that and don’t ever take the project on, but when I got home I started planning. I decided that Blue Sky Bulky Alpaca Naturals was the identical yarn. I bought one skein locally to swatch and plan the pattern. This yarn is a super bulky and I finally went with #17 needles and about 7 stitches for 4”.

$1300-Poncho

After planning and swatching, I ordered 23 skeins just to be safe. It took 20 for the poncho I made, and took about 30 hours of knitting. Those stitches were pretty hard on my hands and I managed to knit about 5” per 2-hour movie.

I tell all of this because it is interesting to note that $1300 is not an inappropriate price. The wholesale price for a $1300 piece of clothing can be calculated to at least half of retail at $650. I received a bulk discount at yarns.com, however the yarn still cost $217.50 (I’m sure a designer can get this yarn for even less). Then I knit for 30 hours. Even at $10.00 an hour that would be $300 and at $20 an hour we are way over the wholesale target. I’m not even including designer showroom and rep costs or shipping.

$1300-Poncho_5

Wow, it’s no wonder hand knits are so expensive. I’m going to go hug my poncho…yummy!