Adventures in Italy and France with my BSF: Part 2 Paris

The second two weeks of our trip were in Paris. Of course, this was before the terrorist attacks. Paris was colorful, lively and simply a delightful place and we are all hoping for a return to it’s former self soon.

We wandered the first day and caught up on a little sleep before taking a cooking class the second night. The food in Paris is great everywhere, from small café, to street vendor to restaurant. There was a lot of walking on our tour, which was a good balance with lots of eating and wine!

Monkfish-with-Ratatouille

Monkfish on a bed of ratatouille at our cooking class

Marcy and Katherine Tilton were knowledgable and fun guides who planned an inside tour for our group. The very first afternoon we had an introduction to their friend Dominique who brought in examples from her exquisite collection of little black dresses.

Dominique-Marcy-and-Katherine

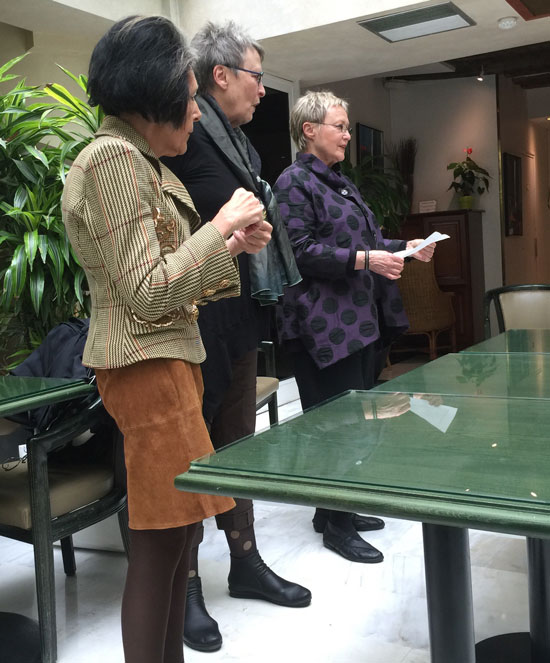
Dominique, Katherine and Marcy at our introduction meeting.

There is no way to cover all of our experiences in a post, but a few of the highlights were the couture flower maker…

Couture-flower-maker2

Each Petal is hand dyed then hand formed with heat and wax with special tools.


the Korea Now! exhibit at the Musée Les Arts Decoratifs-Mode et Textile…

Korea-show

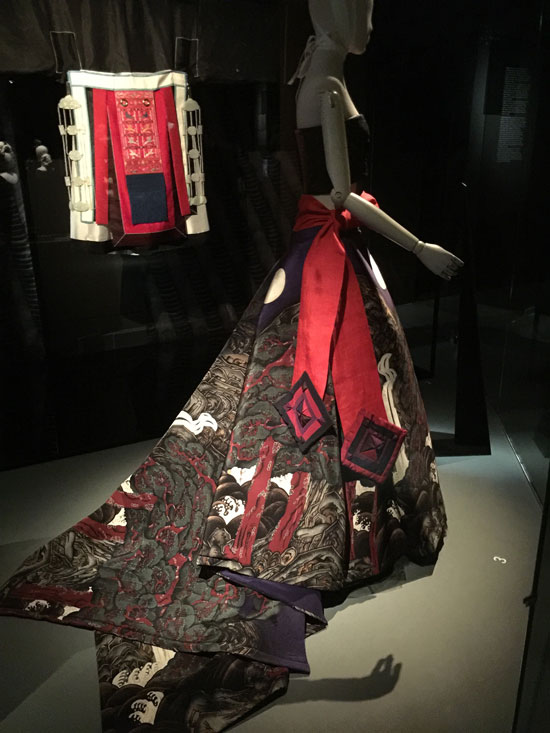
Contemporary gown with a traditional Korean influence


the Alber Elbaz-Lanvin exhibit…

Lanvin-exhibit

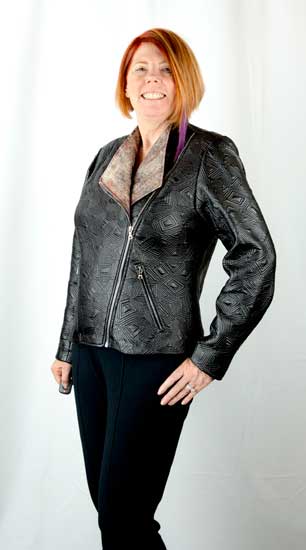
Sweater knit by me, upstaged by some fabulous draping on the mannequins

Giverny in the fall…

Giverny-in-the-Fall

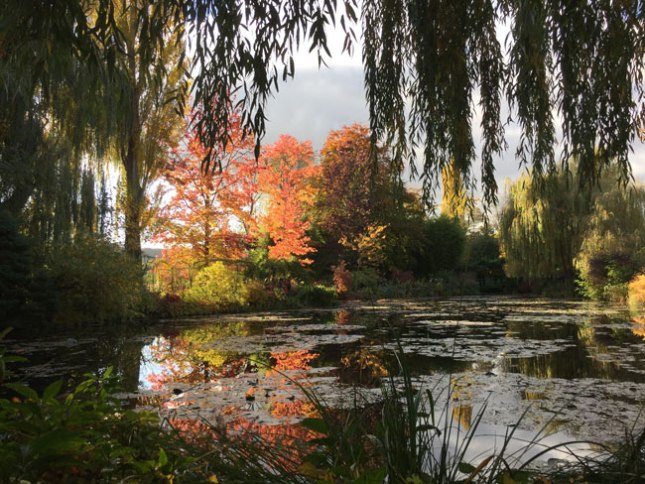
Monet’s pond at Giverny

and then Monet’s water lily rooms at the Musée de l’Orangerie…

Debra-and-I-at-l'orangerie

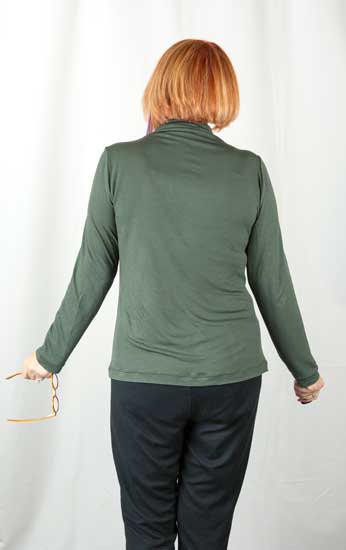
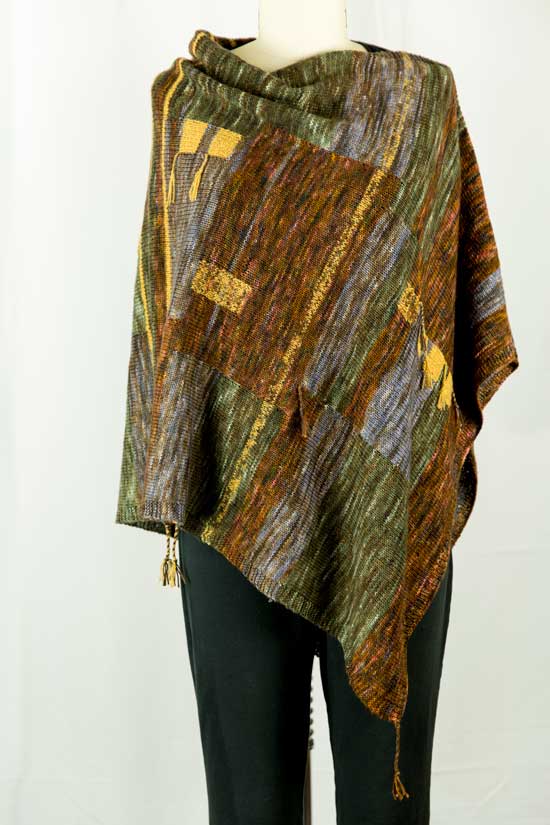
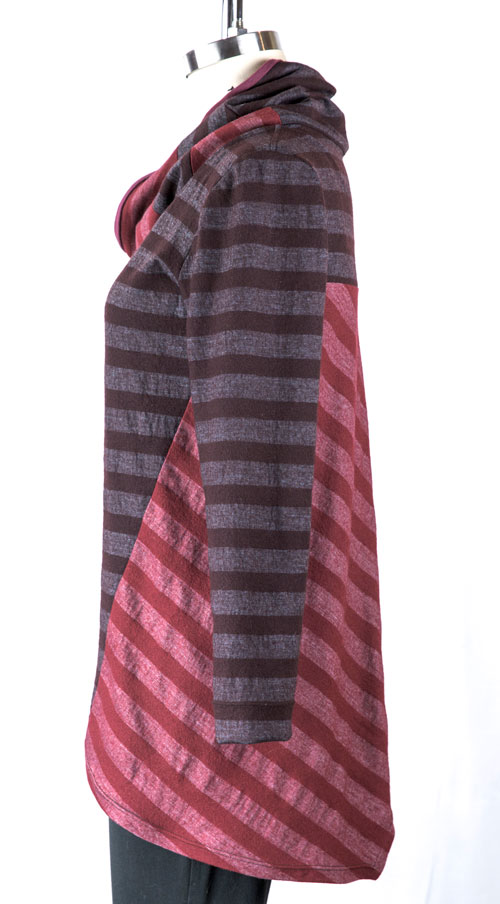
We’re wearing the clothes we made!

and of course SHOPPING! both window and…

real!

This is just some of the purchases. My cat doesn’t want me to sew the scrumptious silk velvet.

The best thing? Being greeted with a beautiful bouquet of roses and a hug when I walked into my door!Welcom-Back-Roses

Adventures in Italy and France with my BSF: Part 1 Italy

I’m back (and over the jet-lag) from our wonderful adventures in Italy and France and it could not have been more fun. The weather was perfect, in fact almost too warm for the cold weather clothes we packed! My BSF and I simply had a wonderful time, and our week with the Tilton sisters was fantastic.Positano Steps

The first two days were all travel to our first destination in Italy. Two planes, two trains and we were exhausted. Finally, a charming young Italian gentleman met us at the door of our train in Salerno. He was holding our name up on a sign, and Debra and I almost hugged him!  We were so relieved to be done with the complex travel changes of the last two days.

On the way, our driver calls the hotel and speaks Italian and then explains the streets are too small to park right in front. You have to picture this: the two of us get to our hotel and a porter meets us at the car and takes our two big bags. We start to follow him up some steps with out purses and carry on luggage. Then up a few more steps under a covered walkway. Then more steps to turn a corner, and then there are more steps! I had a breakdown at about 60 steps. My FORMER BSF, Debra looks down from the last 10 steps and starts laughing at me from the hotel entry! We both found it funny a few minutes later, and our adventure had officially begun.

Anna and Debra
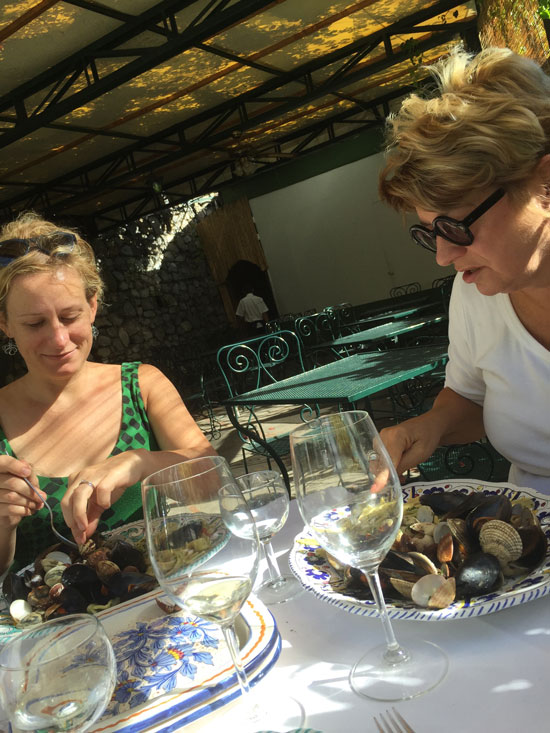
My daughter Anna met us in Positano. She lives in Sicily and is getting married to a lovely Italian man in 2016…lots to talk about! She showed us the ropes of how to order fabulous food in Italy.

Positano-from-our-hotel

The view from our hotel balcony was stunning, and Italian linen and clothes made from the linen fills the stores in Positano. We both bought a piece of clothing since it was warmer than expected. It’s always good to have an excuse to shop! In one store the seamstress didn’t speak english, but we had one word in common, she was sewing on a “Bernina”. After 4 days of relaxation we were ready to head to Rome for a few days of true tourist. I won’t bore you with lots of tourist photos of Rome, but here are a few highlights.Near-Coloseum-web

We are by the Coliseum walking around the ruins, and just being tourists for a day. I’m wearing one of my 45 minute turtlenecks and a hidden zipper scarf. It was still too warm to wear the sweaters and coats that we both made for the trip.Nun-Bride-and-Groom

Love this scene…so Rome!

Big-Foot-and-the-Putti

We had a tour of the Vatican Museums including the Sistine Chapel. It’s an overwhelming museum and there were bits and pieces of sculpture lining the hallways. I call this photo “Big foot and the Putti”…I so wish I had a band.

Pizza-and-wine-take-out

The last night in Rome we had pizza and a movie in our room watching our iPad. Paris on the next post, and I promise we will be wearing the clothes we made!

Tried and True

stripe-tunic_3I thought I was going to take this to Europe, but decided against it because of the weight. The two stripe knits are wool that I washed first, and while very comfy to wear it’s a little bulky to pack. I used my TNT pattern Vogue 8962 which I love to sew with striped fabric because of the back detail. Isn’t this a fun back? stripe-tunic_4I didn’t have enough fabric so I cut the pieces out with a corner missing, thinking that something could be done with the other color to fill in the missing piece. I think the split tail is kind of fun, so I ended up just leaving it and adding the square on the upper back for balance. I also didn’t have enough fabric for the cowl neck. I pieced both colors for the top, then decided that it would be more comfortable to have cotton knit instead of wool around my neck. I love having a stash in my favorite colors just for something like this!stripe-tunicI‘m in Paris at this point, but hoping to have photos to post soon!

Leaving for Paris and Rome

It’s been over a month since I’ve posted an entry! I haven’t been idle, but busy getting ready for my trip. For the first part of the trip my BSF and I are flying to Rome, then visiting my step-daughter in Positano. Then we return to Rome for a few days and then off to Paris with Marcy and Katherine Tilton! I can barely sleep, but haven’t had the time to take photographs. I wanted to catch up before I left so I’ll be posting a couple of entries to show up now, and in a week or so. Posting on vacation will depend on lots of factors, so I won’t promise, but I’m sure to have a few photos to post on our return.

Without further ado, here is my last piece of clothing for the vacation. discharge-silk-shirt_3

I used Vogue 8746 for the basis of this heavy silk shirt, but with quite a few changes. The silk came from Elfriede’s Fabrics in Boulder. She can always find something for a special project.

The discharge dying is what really stands out and I had so much fun dipping this beautiful dark brown silk in (horrors!) bleach. Yes, I know silk can dissolve in bleach, but I didn’t have the patience to order the appropriate product from Dharma Trading. I tested about 5 samples, which serendipitously turned mustard yellow a color in my travel palette. I did have a stop-bleach product so at least that part of the discharge process was correct. I decided to go for it. What happened? Some of the shirt panels started to dissolve!! Arggh!…Cool… a design opportunity is knocking.
discharge-silk-shirt_4I took some soft fusible knit interfacing and ironed it on the back of golden part of the fabric. Then I started to scribble with my sewing machine to hold the fabric together. Vertical red lines connect the scribbles. While it would be smarter in the future to order the correct product, I’m thrilled with the result.

discharge-silk-shirt_2

There were several alterations to the pattern. I brought the shoulders in, and added a pleat in the back stitched closed at the neck and waist. A piece of LFN labyrinth tape at the top adds design and strength.

discharge-silk-shirt

The original hem is a shirt-tail hem and I extended the straight hem to the bottom of the tail, then added slits to the side. Then finally, I didn’t want the fussiness of a cuff, but kept the little pleat at the cuff line.

I almost forgot! In the end I made another hidden zipper scarf to match!discharge-silk-shirt_5

Travel Vest

Travel-Vest_2I’ve been holding off blogging about this vest because it is almost done. Yes, I made a mistake, which I’m prone to do more often than I admit on this blog! It’s not a big deal and I have an interesting fix in mind, but I had photographed it before I realized the problem. So here is the vest just the way it is, and yes I can wear it this way. If I have time to fix the mistake, I’ll re-blog the fix. In the meantime the only hint is that the collar isn’t correct.Travel-Vest_1

The khaki color reminded me of a safari vest, but I think embroidered silk is a fun replacement for canvas. The lining is the mat side of a red silk charmeuse. Both fabrics are from the fabulous Elfriede’s Fabrics in Boulder, Colorado.Travel-Vest

I used Kwik Sew #3930 as the base pattern. I like the ties at the neck, but wanted a button at the waist. To keep the gathered waist, lining the vest allowed for a casing between the fashion fabric and the lining with a bit of ribbon and a piece of elastic for comfort. The zipper pocket detail from the Moto Jacket replaced the patch pockets giving me another safe spot for valuables or just glasses and lip gloss.

Now you see it, now you don’t

Hidden-Scarf_1

Of course, I need a scarf or two for stylish Paris. On the internet, I noticed a scarf with a hidden pocket for travel. Oooh! good idea! My BSF and I got together and made one, and then I made a second one today. These fabrics coordinate with my travel wardrobe so they should look great with my outfits.
Hidden-ScarfSee that little white piece of paper sticking out of the scarf on the left side? That’s where the pocket is. Pretty handy place to keep that extra stash of important stuff.

Hidden-Scarf_4

A cozy knit will feel good against the skin for this second scarf. The fabric is left over from my two recent 45-minute turtlenecks. Hidden-Scarf_2Hidden-Scarf_3Now you see it, now you don’t! zipper-install

Simply add an invisible zipper to the first side seam while sewing up the scarf. Above is the open zipper and the two pieces of fabric that will turn into the pockets. Then I just finish the tube up with a twist to make an infinity scarf.

Two scarves should be plenty, however I have yet to do a travel mock-up of my outfits. The next week should include some sewing and some planning to find where the missing pieces are. There is still time to sew another piece or two! 5 weeks and 4 days to Paris and Rome!

45-Minute Turtleneck

After last week’s post of the complicated moto jacket I decided to give myself some instant gratification. Turtlenecks are inexpensive to buy as long as you want black! A muted teal green or the perfect taupe is almost impossible to find. I used to have a purchased funnel neck turtleneck (in black of course) that I loved, but it faded and I tossed it into the Goodwill pile.45mintneck_2webThe Debra Zebra Top by Style ARC is a simple three-piece pattern that sews up in 45-minutes! If you add cutting the three pieces then maybe an hour from start to finish. I did have to make alterations before it became the 45-minute wonder. One must purchase a Style Arc pattern in a single size. I choose a 12 and my first try fit perfectly…too perfectly. Every lump, bump and bra strap showed! The shoulders, sleeves and armhole fit well, but the neck was even too tight. I have very little experience with pattern alterations, but it seemed to me that a pivot from the shoulder would open up the pattern to the bust area and then another pivot would keep that open line straight down. It looks like a FBA but flatter and no dart in the end. It worked! The neck was a simple addition to the seams.45mintneckpattern_web

I proceeded to make two more tops in about 2-1/2 hours, including changing thread etc.45mintneck-back

The seams are serged with very little pinning. The hems are finished with a double needle in my sewing machine. I can do a cover stitch with my serger, but not in 45 minutes! The other advantage of a double needle is the wider choice of thread colors for the hem. BTW, do you know that double needles come in a stretch needle? I didn’t until my Amazon account suggested them.45mintneck_1web

Vroom! Vroom!

I’m not only back, but have just finished a project that I have been working on all summer! With a season filled with friends and trips, I can’t complain about how long this moto jacket took, but it sure seemed like a lot of hours were spent on it. Moto-Jacket

When planning my fall travel wardrobe, the Islander Sewing Systems MotorCity Express jacket seemed perfect for Travel. It came to my attention on a class at Craftsy featuring (and including) the pattern. The hybrid plastic-coated, quilted knit came from Marcy Tilton.com a while back and is perfect for making a raincoat or jacket. Street photographers give the impression that Paris is teeming with moto jackets. It’s also wet there so a lightweight rain jacket will come in handy and be stylish. I own a leather version and it weighs too much to bring on a trip.

So that’s the history, but making the jacket took me forever! First I cut everything out and this pattern has a lot of pieces! There are 26 separate pattern pieces, in 5 different materials including the main and contrast fabrics plus lining, interlining and facing/pocket fabrics. I had piles of fabric everywhere! In addition you had to custom size the zippers, which was no small feat.

I need to add a comment about the Craftsy class. After finishing the zipper section I noticed a comment on the right of the video that said, “WAIT!” There were mistakes in the video! Seriously Craftsy? I’m supposed to notice that note before watching the video? Janet Pray’s note went on “If you have already cut your zipper, go back and re-measure and re-cut.” I ordered these zippers on-line! Luckily, mine were correct since I was also following the included written instructions, but this could have been a nightmare! Craftsy when you find a mistake like this you should re-film the class, or at the very least put the warning in the video.The class was helpful, but I don’t like the class’s order of construction, which is supposedly designed to save time. There are too many steps when you move from piece to piece instead of finishing what you have in your hand. For example I would have prefer to make my entire lining including sleeves, and then my entire fashion fabric including sleeves. Janet Pray’s method had you wait until the end to sew the last sleeve seam (there were 2) and set-on all four sleeves at once. This just left me with nothing completed until close to the end. I like to finish a full portion of the project and put it aside to work on the next portion. I suppose her method would be fine if I had constructed this jacket in days instead of weeks. Every time I picked it up again I needed to figure out where I was in the process.moto-jacket_2

With all that criticism I must say I love this jacket! It fits well and the zippers look great. I did not put the chest pockets on since I don’t need to draw attention to that area of my body with shiny zippers! However, that is the only modification I made which is pretty amazing. I plan on this jacket being able to handle a sweater underneath so the size (medium) is the perfect roomy but still figure flattering silhouette.Moto-Jacket_1

Knitting a Poncho

There were delightful positive responses to my last post on the Random Poncho. Thank you! The question asked by several readers was about the size of the poncho. I posted another poncho over a year ago, and being a different size, I thought I would show a comparison. I once made a poncho that draped within 6″ of the floor! I sold that one and never took a photo, but I believe the longer the drape, the more elegant the look, however the shorter versions are more practical.

This alpaca poncho is my constant companion around the house, running errands, and even to dinner to fight off a chill in the air. It fits in my purse so I can easily take it along. Smaller than last weeks poncho, the dimensions are a 25″ x 50″ rectangle with a 13″ neck opening. This wrap never gets in my way so I can wear it while working.

Brown-Poncho-FM

The Random Poncho is a 28″ x 56″ rectangle folded in half. The neck edge is the stitched side so it is also 28″ long when folded. I left a 13″ neck opening (that number works for me) and stitched together the remaining 15″. I started with 8 rows of garter stitch, before the main rows that are 8 stitches in stockinette on each end to give a nice edge. I think the stockinette edge also looks good at the neck and on the shoulder seam.
Random-poncho

Both of these ponchos are asymmetrical when worn. I like the point hanging down one leg, but if you want symmetry, you would add the folded edge length to the neck opening. In other words, the rectangle in this case would be 28″ in width but the length would be 13″ for the neck + 28″=41″ then of course doubled so a knitted dimension of 28″ x 82″ before folding and seaming. The bottom point would swing down between the legs and the whole poncho would be longer.

Ok, I admit it, I’m a poncho nerd!

I’m in Bar Harbor, Maine next week, but hope to come back to my clean studio and start back into my fall sewing!

Random Poncho

Random-poncho_3I finished my first accessory for fall travel to Rome and Italy! Taking my chosen color swatches I went to The Loopy Ewe and picked out four skeins of yarn. Three are Hedgehog fibers sock yarn and the gold is ShibuiKnits Pebble. I wanted to make a shawl or poncho, but I just couldn’t decide. Making a swatch of the knitted fabric didn’t help solve the question. A shawl that would have good dimensions as a poncho was the temporary answer and as you see the poncho won out in the end. Ponchos can be worn as a scarf but are also cozy and easy to keep track of during travel.

Random-poncho

The pattern is my own and completely random! I’m kind of a math geek and love the idea of randomness. You almost have to put your brain outside of the project and just knit. I started out and knitted the rust color until I was bored with it. Then I divided the piece into 3 sections and knit with the main colors. At that point the knitting looked a little bland so I started a stripe of yellow. The four colors were getting all tangled up so I stopped the yellow as it became a square. That gave me the yellow square motifs.
Random-poncho_2The other bit of randomness are the tassels. I had a million (I tend to exaggerate) ends to weave in, and thought why do we always have to weave them in? Aren’t there other options? Yes some of them are tassels! Randomly placed of course.

A girlfriend and I are going to Anderson Ranch for art classes this week. I’m looking forward to the cool days in Snowmass Village, Colorado. I might even try to blog with my iPad if I find a few minutes. I need to start practicing for my Europe trip with the Tilton sisters.